Palworld item database
Every item and structure in Palworld 1.0.5 with how to get it, earliest first: the recipe, the Pals that drop it, the ranch, merchants, chests and where it is on the map. Planning a build? The crafting calculator adds up the raw materials.
- 1,607 items
- 155 structures
- 1,089 with a recipe
- 116 dropped by Pals
- Pal SphereSpheres · Tech 2Put Vixy on a Ranch · Craft it at a Sphere Workbench
- Mega SphereSpheres · Tech 14Put Vixy on a Ranch · Mission: Sealed Pals
- Giga SphereSpheres · Tech 20Put Vixy on a Ranch · Mission: Wildlife Sanctuaries
- Hyper SphereSpheres · Tech 27Put Vixy on a Ranch · Reward from the Arrogant Pal Critic Mammorest
- Ultra SphereSpheres · Tech 35Reward from the Arrogant Pal Critic Kingpaca Cryst · Snowfield junk piles
- Legendary SphereSpheres · Tech 44Mission: Hunting Essentials · Reward from the Arrogant Pal Critic Katress Ignis
- Ultimate SphereSpheres · Tech 51Mission: Formidable Faleris Aqua · Reward from the Arrogant Pal Critic Nitemary
- Exotic SphereSpheres · Tech 58Arena Repeat Clear · Sakurajima enemy camp sea base chests
- Sol SphereSpheres · Tech 67Expedition to Sunreach · Sunreach supply caches
- Ancient SphereSpheres · Tech 74Arena Repeat Clear · Expedition to Desert (hard)
- ArrowAmmo · Tech 3Put Vixy on a Ranch · Craft it at a High Quality Workbench
- Poison ArrowAmmo · Tech 8Craft it at a High Quality Workbench · Buy it from a caravan merchant
- Fire ArrowAmmo · Tech 6Buy it from a Wandering Merchant · Craft it at a High Quality Workbench
- Reinforced ArrowAmmo · Tech 42Buy it from a caravan merchant · Desert treasure chests (tier 1)
- Advanced ArrowAmmo · Tech 57Buy it from a caravan merchant · Sakurajima enemy camp sea base chests
- Coarse AmmoAmmo · Tech 21Buy it from a Wandering Merchant · Reward from the Arrogant Pal Critic Surfent Terra
- Handgun AmmoAmmo · Tech 28Buy it from a Wandering Merchant · Grassland junk piles
- Rifle AmmoAmmo · Tech 36Buy it from a Wandering Merchant · Forest junk piles
- Shotgun ShellAmmo · Tech 39Buy it from a Wandering Merchant · Snowfield junk piles
- Assault Rifle AmmoAmmo · Tech 45Buy it from a Wandering Merchant · Snowfield junk piles
- Rocket AmmoAmmo · Tech 65Buy it from a caravan merchant · Beat a Syndicate Elite
- Decal InkAmmo · Tech 45Craft it at a High Quality Workbench
- Flamethrower FuelAmmo · Tech 52Buy it from a caravan merchant · Beat a PIDF Cleaner
- Missile AmmoAmmo · Tech 56Buy it from a caravan merchant · Beat a Brothers of the Eternal Pyre Martyr
- Grenade AmmoAmmo · Tech 53Reward from the Arrogant Pal Critic Bulldosu · Buy it from a caravan merchant
- Gatling Gun AmmoAmmo · Tech 54Reward from the Arrogant Pal Critic Prunelia · Buy it from a caravan merchant
- Meteorite AmmoAmmo · Tech 38Buy it from a caravan merchant · Craft it at a Production Assembly Line
- Energy CartridgeAmmo · Tech 51Reward from the Arrogant Pal Critic Nitemary · Buy it from a caravan merchant
- Plasma CartridgeAmmo · Tech 61Buy it from a caravan merchant · Lv60 oil rig Greater Chest
- Laser Gatling CartridgeAmmo · Tech 59Buy it from a caravan merchant · Sakurajima enemy camp sea base chests
- Charge Rifle AmmoAmmo · Tech 65Buy it from a caravan merchant · Craft it at an Advanced Workshop
- Overheat Rifle AmmoAmmo · Tech 64Buy it from a caravan merchant · Craft it at an Advanced Workshop
- Energy Shotgun AmmoAmmo · Tech 63Buy it from a caravan merchant · Craft it at an Advanced Workshop
- Boost Gun AmmoAmmo · Tech 25Buy it from a caravan merchant · Craft it at a High Quality Workbench
- Beam Scatter AmmoAmmo · Tech 75Buy it from a caravan merchant · World Tree junk piles
- Plasma Rifle AmmoAmmo · Tech 78Buy it from a caravan merchant · World Tree junk piles
- Beam Launcher AmmoAmmo · Tech 80Buy it from a caravan merchant · World Tree treasure chests
- Mechanical Bow AmmoAmmo · Tech 67Buy it from a caravan merchant · Feybreak enemy camp sea base chests
- Combat SMG AmmoAmmo · Tech 68Buy it from a caravan merchant · Feybreak enemy camp sea base chests
- Prototype Shotgun AmmoAmmo · Tech 69Buy it from a caravan merchant · Feybreak enemy camp sea base chests
- Heavy Assault Rifle AmmoAmmo · Tech 70Buy it from a caravan merchant · Sunreach treasure chests
- Tactical Grenade Launcher AmmoAmmo · Tech 72Buy it from a caravan merchant · Sunreach treasure chests
- Wing CellConsumables · Tech 80Craft it at an Ancient Workbench
- Simple BaitConsumables · Tech 15Buy it from a Wandering Merchant · Mission: A Fine Day for Fishing
- High Quality BaitConsumables · Tech 22Buy it from a Wandering Merchant · Forest junk piles
- Deluxe BaitConsumables · Tech 38Base raid: Syndicate Elites · Desert enemy camp sea base chests
- Beginner BaitConsumablesCraft it at a High Quality Workbench
- Sweet BaitConsumablesCraft it at a High Quality Workbench
- Lucky BaitConsumablesCraft it at a High Quality Workbench
- Quick BaitConsumablesCraft it at a High Quality Workbench
- Alluring BaitConsumables · Tech 52Snowfield enemy camp sea base chests · Craft it at a High Quality Workbench
- Risky BaitConsumablesCraft it at a High Quality Workbench
- Wooden ClubWeapons · Tech 1Craft it at a High Quality Workbench
- Hand-Held TorchWeapons · Tech 1Craft it at a High Quality Workbench
- BatWeapons · Tech 7Craft it at a High Quality Workbench
- Metal BatWeapons · Tech 40Craft it at a Production Assembly Line
- Stone AxeWeapons · Tech 1Craft it at a High Quality Workbench
- Metal AxeWeapons · Tech 11Craft it at a High Quality Workbench
- Refined Metal AxeWeapons · Tech 34Craft it at a Production Assembly Line
- Pal Metal AxeWeapons · Tech 44Craft it at a Production Assembly Line II
- Stone PickaxeWeapons · Tech 1Craft it at a High Quality Workbench
- Metal PickaxeWeapons · Tech 11Craft it at a High Quality Workbench
- Refined Metal PickaxeWeapons · Tech 34Craft it at a Production Assembly Line
- Pal Metal PickaxeWeapons · Tech 44Craft it at a Production Assembly Line II
- Plasma MulticutterWeapons · Tech 54Craft it at a Production Assembly Line II
- Stone SpearWeapons · Tech 3Craft it at a High Quality Workbench
- Metal SpearWeapons · Tech 13Craft it at a High Quality Workbench
- Refined Metal SpearWeapons · Tech 34Craft it at a Production Assembly Line
- Elizabee's StaffWeaponsCraft it · Defeat or catch Elizabee
- Beegarde's SpearWeaponsCraft it
- Lily's SpearWeapons · Tech 55Craft it at a Production Assembly Line
- Enhanced Lily's SpearWeapons · Tech 68Craft it at an Advanced Workshop
- Primitive SwordWeapons · Tech 17Craft it at a High Quality Workbench
- SwordWeapons · Tech 29Craft it at a High Quality Workbench
- KatanaWeapons · Tech 44Craft it at a Production Assembly Line II
- Beam SwordWeapons · Tech 57Craft it at a Production Assembly Line II
- Laser SwordWeapons · Tech 73Craft it at an Ancient Workbench
- Meat CleaverWeapons · Tech 12Craft it at a High Quality Workbench
- Stun BatonWeapons · Tech 22Craft it at a High Quality Workbench
- Metal DetectorWeapons · Tech 58Craft it at a Production Assembly Line II
- Old BowWeapons · Tech 3Craft it at a High Quality Workbench
- Poison BowWeaponsCraft it
- Fire BowWeaponsCraft it
- Three Shot BowWeapons · Tech 10Craft it at a High Quality Workbench
- CrossbowWeapons · Tech 13Craft it at a High Quality Workbench
- Poison Arrow CrossbowWeaponsCraft it
- Fire Arrow CrossbowWeaponsCraft it
- Compound BowWeapons · Tech 42Craft it at a Production Assembly Line
- Advanced BowWeapons · Tech 57Craft it at a Production Assembly Line II
- Mechanical BowWeapons · Tech 67Craft it at an Ancient Workbench
- Makeshift HandgunWeapons · Tech 24Buy it from a Wandering Merchant · Craft it at a Weapon Workbench
- HandgunWeapons · Tech 28Craft it at a Weapon Workbench
- Decal Gun 1Weapons · Tech 45Craft it at a Weapon Workbench
- Decal Gun 2Weapons · Tech 45Craft it at a Weapon Workbench
- Decal Gun 3Weapons · Tech 45Craft it at a Weapon Workbench
- Decal Gun 4Weapons · Tech 45Craft it at a Weapon Workbench
- Decal Gun 5Weapons · Tech 45Craft it at a Weapon Workbench
- Old RevolverWeapons · Tech 33Craft it at a Weapon Assembly Line
- Boost GunWeapons · Tech 25Craft it at a Weapon Workbench
- Megaboost GunWeapons · Tech 63Craft it at an Advanced Weapon Assembly Line
- Grappling GunWeapons · Tech 12Craft it at a High Quality Workbench
- Mega Grappling GunWeapons · Tech 17Craft it at a High Quality Workbench
- Giga Grappling GunWeapons · Tech 31Craft it at a Production Assembly Line
- Hyper Grappling GunWeapons · Tech 49Craft it at a Production Assembly Line II
- Ultra Grappling GunWeapons · Tech 63Craft it at an Advanced Workshop
- Makeshift ShotgunWeapons · Tech 30Craft it at a Weapon Workbench
- Double-Barreled ShotgunWeapons · Tech 39Craft it at a Weapon Assembly Line
- Pump-Action ShotgunWeapons · Tech 43Craft it at a Weapon Assembly Line
- Semi-Auto ShotgunWeapons · Tech 47Craft it at a Weapon Assembly Line II
- Energy ShotgunWeapons · Tech 63Craft it at an Advanced Weapon Assembly Line
- Prototype ShotgunWeapons · Tech 69Craft it at an Ancient Workbench
- Beam ScatterWeapons · Tech 75Craft it at an Ancient Workbench
- MusketWeapons · Tech 21Buy it from a Wandering Merchant · Craft it at a Weapon Workbench
- Single-Shot RifleWeapons · Tech 36Craft it at a Weapon Assembly Line
- Semi-Auto RifleWeapons · Tech 41Craft it at a Weapon Assembly Line
- Makeshift Assault RifleWeapons · Tech 31Craft it at a Weapon Workbench
- Heavy Assault RifleWeapons · Tech 70Craft it at an Ancient Workbench
- Plasma RifleWeapons · Tech 78Craft it at an Ancient Workbench
- Makeshift SMGWeapons · Tech 26Craft it at a Weapon Workbench
- SMGWeapons · Tech 37Craft it at a Weapon Assembly Line
- Combat SMGWeapons · Tech 68Craft it at an Ancient Workbench
- Rocket LauncherWeapons · Tech 65Craft it at a Weapon Assembly Line II
- Meteor LauncherWeapons · Tech 38Craft it at a Weapon Assembly Line
- Single-Shot Sphere LauncherWeapons · Tech 26Craft it at a Weapon Workbench
- Scatter Sphere LauncherWeapons · Tech 38Craft it at a Weapon Assembly Line
- Homing Sphere LauncherWeapons · Tech 55Craft it at a Weapon Assembly Line II
- Laser RifleWeapons · Tech 51Craft it at a Weapon Assembly Line II
- Charge RifleWeapons · Tech 65Craft it at an Advanced Weapon Assembly Line
- Overheat RifleWeapons · Tech 64Craft it at an Advanced Weapon Assembly Line
- FlamethrowerWeapons · Tech 52Craft it at a Weapon Assembly Line II
- Gatling GunWeapons · Tech 54Craft it at a Weapon Assembly Line II
- Laser Gatling GunWeapons · Tech 59Craft it at a Weapon Assembly Line II
- Grenade LauncherWeapons · Tech 53Craft it at a Weapon Assembly Line II
- Tactical Grenade LauncherWeapons · Tech 72Craft it at an Ancient Workbench
- Guided Missile LauncherWeapons · Tech 56Craft it at a Weapon Assembly Line II
- Multi Guided Missile LauncherWeaponsCraft it at a Weapon Assembly Line II
- Plasma CannonWeapons · Tech 61Craft it at a Weapon Assembly Line II
- Beam LauncherWeapons · Tech 80Craft it at an Ancient Workbench
- Drone LauncherWeapons · Tech 77Craft it at an Ancient Workbench
- ExcaliburWeaponsCraft it at a Production Assembly Line
- Terra BladeWeaponsCraft it at a Production Assembly Line
- Vortex BeaterWeaponsCraft it at a Weapon Assembly Line
- NightglowWeaponsCraft it at a Production Assembly Line
- TerraprismaWeaponsCraft it at a Production Assembly Line
- MeowmereWeapons · Tech 30Craft it at a High Quality Workbench
- Legendary MeowmereWeaponsCraft it · Beat the Moon Lord
- Marksman RevolverWeapons · Tech 32Craft it at a Weapon Assembly Line
- Core Eject ShotgunWeapons · Tech 56Craft it at a Weapon Assembly Line II
- Beginner Fishing Rod (Chillet)Weapons · Tech 15Craft it at a High Quality Workbench
- Beginner Fishing Rod (Gumoss)WeaponsCraft it at a High Quality Workbench
- Intermediate Fishing Rod (Cattiva)Weapons · Tech 29Craft it at a Production Assembly Line
- Intermediate Fishing Rod (Croajiro)WeaponsCraft it at a Production Assembly Line
- Advanced Fishing Rod (Pengullet)Weapons · Tech 45Craft it at a Production Assembly Line II
- Advanced Fishing Rod (Depresso)WeaponsCraft it at a Production Assembly Line II
- Frag GrenadeWeapons · Tech 25Reward from the Arrogant Pal Critic Menasting · Grassland treasure chests (tier 1)
- Shock GrenadeWeapons · Tech 27Desert junk piles · Craft it at a Weapon Workbench
- Ice GrenadeWeapons · Tech 29Craft it at a Weapon Workbench
- Incendiary GrenadeWeapons · Tech 31Reward from the Arrogant Pal Critic Katress Ignis · Volcano junk piles
- Water GrenadeWeapons · Tech 33Craft it at a Weapon Workbench
- Grass GrenadeWeapons · Tech 35Craft it at a Weapon Workbench
- Ground GrenadeWeapons · Tech 38Craft it at a Weapon Workbench
- Dark GrenadeWeapons · Tech 40Reward from the Arrogant Pal Critic Dogen · Craft it at a Weapon Workbench
- Dragon GrenadeWeapons · Tech 42Craft it at a Weapon Workbench
- Frag Grenade Mk2Weapons · Tech 53Desert enemy camp chests · Craft it at a Weapon Workbench
- Pal Recovery GrenadeWeapons · Tech 32Craft it at a Weapon Workbench
- Common ShieldArmor · Tech 4Craft it at a High Quality Workbench
- Mega ShieldArmor · Tech 16Craft it at a High Quality Workbench
- Giga ShieldArmor · Tech 29Craft it at a Production Assembly Line
- Hyper ShieldArmor · Tech 43Craft it at a Production Assembly Line II
- Ultra ShieldArmor · Tech 55Craft it at a Production Assembly Line II
- Advanced ShieldArmor · Tech 60Craft it at a Production Assembly Line II
- Ancient ShieldArmor · Tech 71Craft it at an Ancient Workbench
- Cloth OutfitArmor · Tech 4Craft it at a High Quality Workbench
- Tropical OutfitArmor · Tech 9Craft it at a High Quality Workbench
- Tundra OutfitArmor · Tech 9Craft it at a High Quality Workbench
- Pelt ArmorArmor · Tech 12Craft it at a High Quality Workbench
- Heat Resistant Pelt ArmorArmor · Tech 16Buy it from a Wandering Merchant · Craft it at a High Quality Workbench
- Cold Resistant Pelt ArmorArmor · Tech 18Buy it from a Wandering Merchant · Craft it at a High Quality Workbench
- Metal ArmorArmor · Tech 23Craft it at a High Quality Workbench
- Heat Resistant Metal ArmorArmor · Tech 25Craft it at a High Quality Workbench
- Cold Resistant Metal ArmorArmor · Tech 27Craft it at a High Quality Workbench
- Refined Metal ArmorArmor · Tech 37Craft it at a Production Assembly Line
- Heat Resistant Refined Metal ArmorArmor · Tech 40Craft it at a Production Assembly Line
- Cold Resistant Refined Metal ArmorArmor · Tech 41Craft it at a Production Assembly Line
- Pal Metal ArmorArmor · Tech 46Craft it at a Production Assembly Line II
- Heat Resistant Pal Metal ArmorArmor · Tech 48Craft it at a Production Assembly Line II
- Cold Resistant Pal Metal ArmorArmor · Tech 50Craft it at a Production Assembly Line II
- Plasteel ArmorArmor · Tech 51Craft it at a Production Assembly Line II
- Heat Resistant Plasteel ArmorArmor · Tech 53Craft it at a Production Assembly Line II
- Cold Resistant Plasteel ArmorArmor · Tech 54Craft it at a Production Assembly Line II
- Lightweight Plasteel ArmorArmor · Tech 55Craft it at a Production Assembly Line II
- Hexolite ArmorArmor · Tech 59Craft it at a Production Assembly Line II
- Heat Resistant Hexolite ArmorArmor · Tech 63Craft it at a Production Assembly Line II
- Cold Resistant Hexolite ArmorArmor · Tech 64Craft it at a Production Assembly Line II
- Lightweight Hexolite ArmorArmor · Tech 65Craft it at a Production Assembly Line II
- Ancient ArmorArmor · Tech 68Craft it at an Ancient Workbench
- Heat-Resistant Ancient ArmorArmor · Tech 75Craft it at an Ancient Workbench
- Cold-Resistant Ancient ArmorArmor · Tech 77Craft it at an Ancient Workbench
- Lightweight Ancient ArmorArmor · Tech 79Craft it at an Ancient Workbench
- Depresso ArmorArmorCraft it · Mission: That's That Me, Depresso!
- Hallowed Plate MailArmorCraft it at a Production Assembly Line
- V1 ArmorArmor · Tech 32Craft it at a Production Assembly Line
- V2 ArmorArmor · Tech 56Craft it at a Production Assembly Line II
- Feathered Hair BandArmor · Tech 10Craft it at a High Quality Workbench
- Metal HelmArmor · Tech 23Craft it at a High Quality Workbench
- Refined Metal HelmArmor · Tech 37Craft it at a Production Assembly Line
- Pal Metal HelmArmor · Tech 46Craft it at a Production Assembly Line II
- Plasteel HelmetArmor · Tech 51Craft it at a Production Assembly Line II
- Hexolite HelmetArmor · Tech 60Craft it at a Production Assembly Line II
- Ancient HelmArmor · Tech 68Craft it at an Ancient Workbench
- Hallowed MaskArmorCraft it at a Production Assembly Line
- Hallowed HelmetArmorCraft it at a Production Assembly Line
- Hallowed HeadgearArmorCraft it at a Production Assembly Line
- Hallowed HoodArmorCraft it at a Production Assembly Line
- Monarch's CrownArmorCraft it at a High Quality Workbench
- Golden CrownArmorCraft it at a High Quality Workbench
- Long-Eared HeadbandArmorCraft it at a High Quality Workbench
- Witch HatArmorCraft it at a High Quality Workbench
- Soft HatArmorCraft it at a High Quality Workbench
- HelmetArmorCraft it at a High Quality Workbench
- Silk HatArmorCraft it at a High Quality Workbench
- TricorneArmorCraft it at a High Quality Workbench
- Explorer CapArmorCraft it at a High Quality Workbench
- Graduation CapArmorCraft it at a High Quality Workbench
- Farming HatArmorCraft it at a High Quality Workbench
- Bowler HatArmorCraft it at a High Quality Workbench
- Tocotoco CapArmorCraft it at a High Quality Workbench
- Grinning Tocotoco CapArmorCraft it at a High Quality Workbench
- Gumoss CapArmorCraft it at a High Quality Workbench
- Penking CapArmorCraft it at a High Quality Workbench
- Katress CapArmorCraft it at a High Quality Workbench
- Lyleen AccessoryArmorCraft it · Trade for it at the Medal Merchant
- Sibelyx HatArmorCraft it · Trade for it at the Medal Merchant
- Leezpunk HoodArmorCraft it at a High Quality Workbench
- Killamari CapArmorCraft it at a High Quality Workbench
- Cawgnito HatArmorCraft it · Trade for it at the Medal Merchant
- Ribbuny HeadbandArmorCraft it at a High Quality Workbench
- Lamball HelmArmorCraft it · Trade for it at the Medal Merchant
- Dumud HelmArmorCraft it · Trade for it at the Medal Merchant
- Swee CapArmorCraft it at a High Quality Workbench
- Dazzi HatArmorCraft it at a High Quality Workbench
- Cattiva HatArmorCraft it · Trade for it at the Medal Merchant
- Herbil HeadbandArmorTrade for it at the Bounty shop
- Jelliette HatArmorTrade for it at the Medal Merchant
- Turtacle CapArmorTrade for it at the Bounty shop
- Kingpaca HeadbandArmorTrade for it at the Arena shop
- Gloopie HatArmorTrade for it at the Medal Merchant
- Croajiro CapArmorTrade for it at the Bounty shop
- Chikipi CapArmorTrade for it at the Medal Merchant
- Dandilord HatArmorTrade for it at the Arena shop
- Shroomer HatArmorTrade for it at the Arena shop
- Ghangler AccessoryArmorTrade for it at the Arena shop
- Icelyn HatArmorTrade for it at the Arena shop
- Splatterina HatArmorTrade for it at the Arena shop
- Tarantriss HatArmorTrade for it at the Arena shop
- Witch's CrownArmorCraft it · Beat the Twilight Siren (Ultra) Bellanoir Libero
- Horns of SupremacyArmorCraft it · Beat the Incarnation of the Eternal Flame (Ultra) Blazamut Ryu
- Xenolord's headArmorCraft it · Beat the Invader from Space (Ultra) Xenolord
- Moon Lord MaskArmorCraft it · Beat the Moon Lord
- Crown of SalvationArmorCraft it · Beat the King of Salvation (Ultra) Hartalis
- Zoe HatArmorCraft it · Beat the Rayne Syndicate Boss Zoe & Grizzbolt
- Lily HatArmorCraft it · Beat the Free Pal Alliance Founder Lily & Lyleen
- Axel HatArmorCraft it · Beat the Brothers of the Eternal Pyre Soul Leader Axel & Orserk
- Marcus HatArmorCraft it · Beat the PIDF Commander Marcus & Faleris
- Victor HatArmorCraft it · Beat the PAL Genetic Research Unit Commander Victor & Shadowbeak
- Saya HatArmorCraft it · Beat the Leader of the Moonflowers Saya & Selyne
- Bjorn HatArmorCraft it · Beat the Jarl of Feybreak Bjorn & Bastigor
- Auri HatArmorCraft it · Beat the High Keeper of the Azure Covenant Auri & Shaolong
- Zenara HatArmorCraft it · Beat the Blightstar Calamity Zenara & Astralym
- Depresso HelmetArmorCraft it · Mission: That's That Me, Depresso!
- Eye of Cthulhu MaskArmorCraft it · Beat the Eye of Cthulhu
- Life PendantAccessoriesCraft it at a High Quality Workbench
- Attack PendantAccessoriesCraft it at a High Quality Workbench
- Defense PendantAccessoriesCraft it at a High Quality Workbench
- Pendant of DiligenceAccessoriesCraft it at a High Quality Workbench
- Heat Resistant UndershirtAccessoriesCraft it at a High Quality Workbench
- Thermal UndershirtAccessoriesCraft it at a High Quality Workbench
- Multiclimate UndershirtAccessoriesCraft it at a High Quality Workbench
- Explosion-Resistant UndershirtAccessories · Tech 76Craft it at an Ancient Workbench
- Corrosive Mist MaskAccessories · Tech 76Craft it at an Ancient Workbench
- Ring of Neutral ResistanceAccessoriesCraft it at a High Quality Workbench
- Ring of Fire ResistanceAccessoriesCraft it at a High Quality Workbench
- Ring of Water ResistanceAccessoriesCraft it at a High Quality Workbench
- Ring of Electric ResistanceAccessoriesCraft it at a High Quality Workbench
- Ring of Grass ResistanceAccessoriesCraft it at a High Quality Workbench
- Ring of Ice ResistanceAccessoriesCraft it at a High Quality Workbench
- Ring of Ground ResistanceAccessoriesCraft it at a High Quality Workbench
- Ring of Dark ResistanceAccessoriesCraft it at a High Quality Workbench
- Ring of Dragon ResistanceAccessoriesCraft it at a High Quality Workbench
- Ring of MercyAccessories · Tech 18Craft it at a High Quality Workbench
- Ability GlassesAccessories · Tech 34Craft it at a High Quality Workbench
- Ring of FreightAccessoriesCraft it at a High Quality Workbench
- Anti-Gravity BeltAccessories · Tech 28Craft it at a High Quality Workbench
- Double Jump BootsAccessories · Tech 40Craft it at a High Quality Workbench
- Triple Jump BootsAccessories · Tech 70Craft it at an Ancient Workbench
- Air Dash BootsAccessories · Tech 35Craft it at a High Quality Workbench
- Double Air Dash BootsAccessories · Tech 61Craft it at a Production Assembly Line
- Triple Air Dash BootsAccessories · Tech 65Craft it at a Production Assembly Line
- Neutral Support WhistleAccessoriesCraft it at a High Quality Workbench
- Fire Support WhistleAccessoriesCraft it at a High Quality Workbench
- Water Support WhistleAccessoriesCraft it at a High Quality Workbench
- Electric Support WhistleAccessoriesCraft it at a High Quality Workbench
- Grass Support WhistleAccessoriesCraft it at a High Quality Workbench
- Ice Support WhistleAccessoriesCraft it at a High Quality Workbench
- Ground Support WhistleAccessoriesCraft it at a High Quality Workbench
- Dark Support WhistleAccessoriesCraft it at a High Quality Workbench
- Dragon Support WhistleAccessoriesCraft it at a High Quality Workbench
- Attack Support WhistleAccessoriesCraft it at a High Quality Workbench
- Defense Support WhistleAccessoriesCraft it at a High Quality Workbench
- Growth Acceleration BellAccessoriesCraft it at a High Quality Workbench
- Dogen EmblemAccessoriesCraft it at a Production Assembly Line
- Silvegis EmblemAccessoriesCraft it at a Production Assembly Line
- Reptyro CharmAccessoriesCraft it at a Production Assembly Line
- Wumpo CharmAccessoriesCraft it at a Production Assembly Line
- Wandering Merchant CharmAccessoriesCraft it at a Production Assembly Line
- Vanguard CharmAccessoriesCraft it at a Production Assembly Line
- Warsect Terra's BeltAccessoriesCraft it at a Production Assembly Line
- Islander's Tool BeltAccessoriesCraft it at a Production Assembly Line
- Celestial Emperor's BatonAccessoriesCraft it at a Production Assembly Line
- Flame Emperor's BatonAccessoriesCraft it at a Production Assembly Line
- Lord of the Sea's BatonAccessoriesCraft it at a Production Assembly Line
- Lord of Lightning's BatonAccessoriesCraft it at a Production Assembly Line
- Spirit Emperor's BatonAccessoriesCraft it at a Production Assembly Line
- Ice Emperor's BatonAccessoriesCraft it at a Production Assembly Line
- Earth Emperor's BatonAccessoriesCraft it at a Production Assembly Line
- Lord of the Underworld's BatonAccessoriesCraft it at a Production Assembly Line
- Divine Dragon's BatonAccessoriesCraft it at a Production Assembly Line
- Pal Tamer's GlassesAccessoriesCraft it at a Production Assembly Line
- Air Walker Mk IAccessoriesCraft it at a Production Assembly Line
- Air Walker Mk IIAccessoriesCraft it at a Production Assembly Line
- Air Walker Mk IIIAccessoriesCraft it at a Production Assembly Line
- Air Walker EXAccessoriesCraft it at a Production Assembly Line
- Hartalis's TalismanAccessoriesCraft it at a Production Assembly Line
- Blazamut's TalismanAccessoriesCraft it at a Production Assembly Line
- Neptilius's TalismanAccessoriesCraft it at a Production Assembly Line
- Orserk's TalismanAccessoriesCraft it at a Production Assembly Line
- Lyleen's TalismanAccessoriesCraft it at a Production Assembly Line
- Frostallion's TalismanAccessoriesCraft it at a Production Assembly Line
- Anubis's TalismanAccessoriesCraft it at a Production Assembly Line
- Lyleen Noct's TalismanAccessoriesCraft it at a Production Assembly Line
- Jetragon's TalismanAccessoriesCraft it at a Production Assembly Line
- Blazehowl RingAccessoriesCraft it at a Production Assembly Line
- Faleris Aqua RingAccessoriesCraft it at a Production Assembly Line
- Fenglope Lux RingAccessoriesCraft it at a Production Assembly Line
- Menasting Terra RingAccessoriesCraft it at a Production Assembly Line
- Vaelet RingAccessoriesCraft it at a Production Assembly Line
- Katress RingAccessoriesCraft it at a Production Assembly Line
- Elphidran RingAccessoriesCraft it at a Production Assembly Line
- Cryolinx RingAccessoriesCraft it at a Production Assembly Line
- Faleris RingAccessoriesCraft it at a Production Assembly Line
- Ring of TrustAccessoriesCraft it at a Production Assembly Line
- Phantom RingAccessoriesCraft it at a Production Assembly Line
- Normal ParachuteGliders · Tech 5Craft it at a High Quality Workbench
- Mega GliderGliders · Tech 18Craft it at a High Quality Workbench
- Giga GliderGliders · Tech 40Craft it at a Production Assembly Line
- Hyper GliderGliders · Tech 52Craft it at a Production Assembly Line II
- Wing PackGliders · Tech 80Craft it at an Ancient Workbench
- CakeFoodMission: Hungry for Recruits · Craft it at a Cooking Pot
- Mushroom CakeFood · Tech 30Craft it at a Cooking Pot
- Vegetable CakeFood · Tech 47Craft it at an Electric Kitchen
- Extravagant Vegetable CakeFood · Tech 60Mission: Operation: Splatterina Spree · Craft it at a Large-Scale Stone Oven
- Special CakeFood · Tech 74Mission: Operation: Splatterina Spree · Craft it at an Ancient Kitchen
- Mammorest CurryFoodBuy it from a caravan merchant · Sakurajima enemy camp chests
- Broncherry Fried NoodlesFoodCraft it at an Electric Kitchen
- Mozzarina CheeseburgerFoodMission: A Special Dish · Craft it at an Electric Kitchen
- Roast ReindrixFoodCraft it at a Campfire
- Broncherry Rib RoastFoodCraft it at a Campfire
- Mammorest SteakFoodCraft it at a Campfire · Reward from the Arrogant Pal Critic Mammorest
- Eikthyrdeer StewFoodReward from the Arrogant Pal Critic Kingpaca · Buy it from a caravan merchant
- Seafood PastaFoodCraft it at an Electric Kitchen · Sunreach enemy camp chests
- PizzaFoodBeat a Pineapple Pizza Enthusiast Aloha · Craft it at an Electric Kitchen
- Mushroom QuicheFoodCraft it at a Large-Scale Stone Oven
- Broncherry MeatFoodBuy it from a caravan merchant · Defeat or catch Broncherry
- Mammorest MeatFoodBuy it from a caravan merchant · Defeat or catch Mammorest
- Eikthyrdeer Loco MocoFoodReward from the Gourmet Hunter · Buy it from a caravan merchant
- Dumud ChowderFoodReward from the Arrogant Pal Critic Digtoise · Desert treasure chests (tier 1)
- Rushoar Bacon 'n' EggsFoodReward from the Gourmet Hunter · Volcano treasure chests (tier 1)
- Mozzarina HamburgerFoodCraft it at an Electric Kitchen
- Galeclaw NikujagaFoodReward from the Arrogant Pal Critic Foxcicle · Buy it from a caravan merchant
- Grilled LamballFoodMission: Hunger is the Greatest Foe · Reward from the Gourmet Hunter
- MinestroneFoodCraft it at an Electric Kitchen
- Rushoar Hot DogFoodCraft it at an Electric Kitchen
- Reindrix StewFoodSnowfield treasure chests (tier 1) · Craft it at a Cooking Pot
- CarbonaraFoodCraft it at an Electric Kitchen
- Rushoar GyozaFoodCraft it at a Cooking Pot
- Spring RollsFoodCraft it at an Electric Kitchen
- GratinFoodCraft it at an Electric Kitchen
- Fried ChikipiFoodReward from the Gourmet Hunter · Craft it at an Electric Kitchen
- Fried KelpseaFoodCraft it at an Electric Kitchen
- Seafood SaladFoodBuy it from a caravan merchant · Craft it at an Electric Kitchen
- Herb Roasted LamballFoodReward from the Gourmet Hunter · Craft it at a Cooking Pot
- Chikipi SautéFoodMission: Hunger is the Greatest Foe · Reward from the Gourmet Hunter
- Stewed GaleclawFoodCraft it at a Cooking Pot
- Salt-Grilled SkutlassFoodCraft it at a Campfire
- Munchill SteakFoodCraft it at a Campfire
- SaladFoodCraft it at a Cooking Pot
- Skutlass SashimiFoodBuy it from a caravan merchant · Defeat or catch Skutlass
- Herb Roasted CaprityFoodCraft it at a Campfire · Reward from the Gourmet Hunter
- Mozzarina SteakFoodCraft it at a Campfire
- Fried Gloopie BallsFoodCraft it at a Cooking Pot
- Broiled DumudFoodCraft it at a Campfire
- Roast EikthyrdeerFoodCraft it at a Campfire
- OmeletFoodBuy it from a caravan merchant · Craft it at a Cooking Pot
- Reindrix VenisonFoodBuy it from a caravan merchant · Defeat or catch Reindrix
- Marinated MushroomsFoodBuy it from a caravan merchant · Craft it at a Cooking Pot
- Roast RushoarFoodCraft it at a Campfire
- Jellroy's Jolly JellyFoodBuy it from a caravan merchant · Craft it at a Cooking Pot
- Jelliette's Jiggly JellyFoodBuy it from a caravan merchant · Craft it at a Cooking Pot
- Caprity MeatFoodBuy it from a caravan merchant · Defeat or catch Caprity
- Mozzarina MeatFoodDefeat or catch Mozzarina · Buy it from a caravan merchant
- Stir-Fried VegetablesFoodCraft it at a Cooking Pot
- Mushroom SoupFoodBuy it from a caravan merchant · Craft it at a Cooking Pot
- Lamball KebabFoodCraft it at a Campfire
- Jam-Filled BunFoodBuy it from a caravan merchant · Craft it at a Cooking Pot
- Raw DumudFoodBuy it from a caravan merchant · Defeat or catch Dumud
- Eikthyrdeer VenisonFoodDefeat or catch Eikthyrdeer · Buy it from a caravan merchant
- Grilled ChikipiFoodCraft it at a Campfire
- Grilled KelpseaFoodCraft it at a Campfire
- Grilled GaleclawFoodCraft it at a Campfire · Reward from the Arrogant Pal Critic Muffly
- Rushoar PorkFoodDefeat or catch Rushoar · Buy it from a caravan merchant
- PancakeFoodCraft it at a Cooking Pot
- Munchill MeatFoodDefeat or catch Munchill · Buy it from a caravan merchant
- Gloopie TentacleFoodDefeat or catch Gloopie · Buy it from a caravan merchant
- Lamball MuttonFoodDefeat or catch Lamball · Buy it from a Wandering Merchant
- Jellroy Bell FleshFoodDefeat or catch Jellroy · Buy it from a caravan merchant
- Chikipi PoultryFoodDefeat or catch Chikipi · Buy it from a Wandering Merchant
- Raw KelpseaFoodDefeat or catch Kelpsea · Buy it from a caravan merchant
- Galeclaw PoultryFoodDefeat or catch Galeclaw · Buy it from a caravan merchant
- French FriesFoodCraft it at a Cooking Pot
- Jelliette Bell FleshFoodDefeat or catch Jelliette · Buy it from a caravan merchant
- BreadFoodCraft it at a Campfire · Buy it from a caravan merchant
- Fried EggFoodCraft it at a Campfire
- Baked BerriesFoodCraft it at a Campfire
- Baked MushroomFoodCraft it at a Campfire
- EggFoodPut Chikipi on a Ranch · Defeat or catch Chikipi
- Hot MilkFoodCraft it at a Campfire
- Red BerriesFoodGather it on the map · Defeat or catch Cattiva
- TomatoFoodBuy it from a Wandering Merchant · Grow it on a Tomato Plantation
- LettuceFoodBuy it from a Wandering Merchant · Grow it on a Lettuce Plantation
- Cavern MushroomFoodBuy it from a caravan merchant · Expedition to Volcano
- MushroomFoodGather it on the map · Defeat or catch Tanzee
- MilkFoodBuy it from a Wandering Merchant · Put Mozzarina on a Ranch
- PotatoFoodBuy it from a caravan merchant · Grow it on a Potato Plantation
- HoneyFoodDefeat or catch Cinnamoth · Put Beegarde on a Ranch
- CarrotFoodBuy it from a caravan merchant · Defeat or catch Ribbuny Botan
- OnionFoodBuy it from a caravan merchant · Grow it on an Onion Plantation
- WheatFoodBuy it from a Wandering Merchant · Grow it on a Wheat Plantation
- Cotton CandyFoodPut Woolipop on a Ranch · Defeat or catch Woolipop
- Caramel Cotton CandyFoodPut Woolipop on a Ranch · Defeat or catch Woolipop Terra
- FlourFoodCraft it at a Mill
- Mysterious MushroomFoodBuy it from a caravan merchant · Defeat or catch Shroomer Noct
- Low Grade Medical SuppliesConsumablesDefeat or catch Lifmunk · Buy it from a Wandering Merchant
- Medical SuppliesConsumablesBuy it from a Wandering Merchant · Mission: Breeding Basics
- High Grade Medical SuppliesConsumablesBuy it from a Wandering Merchant · Reward from the Arrogant Gourmet Salad
- Mind Control MedsConsumablesCraft it
- Low Quality Recovery MedsConsumablesReward from the Arrogant Pal Critic Tombat · Craft it at a Medieval Medicine Workbench
- Recovery MedsConsumablesReward from the Arrogant Pal Critic Elphidran · Craft it at a Medieval Medicine Workbench
- High Quality Recovery MedsConsumablesMission: No Mercy for Pal Thieves · Buy it from a caravan merchant
- Advanced Recovery MedsConsumables · Tech 61Treasure map dig spot · Lv60 oil rig Normal Chest
- Beautiful FlowerMaterialsGather it on the map · Defeat or catch Ribbuny
- Suspicious JuiceConsumablesCraft it at a Medieval Medicine Workbench · Buy it from a caravan merchant
- Strange JuiceConsumablesCraft it at a Medieval Medicine Workbench · Buy it from a caravan merchant
- Mysterious Mushroom JuiceConsumablesCraft it at an Electric Medicine Workbench
- Memory Wiping MedicineConsumablesReward from the Desert Town Ambassador · Defeat or catch Lovander
- Nutrient TonicConsumables · Tech 79World Tree treasure chests · Craft it at an Advanced Medicine Workbench
- Water Radiant GemMaterialsInside a Glistening Ancient Relic · Defeat or catch Rayhound Cryst
- Electric Radiant GemMaterialsBeat the Highly Modified Grizzbolt · Inside a Glistening Ancient Relic
- Ground Radiant GemMaterialsInside a Glistening Ancient Relic · Defeat or catch Dualith
- Grass Radiant GemMaterialsInside a Glistening Ancient Relic · Beat the Highly Modified Lyleen
- Fire Radiant GemMaterialsInside a Glistening Ancient Relic · Defeat or catch Knocklem Ignis
- Ice Radiant GemMaterialsInside a Glistening Ancient Relic · World Tree water chests
- Dragon Radiant GemMaterialsInside a Glistening Ancient Relic · World Tree fire chests
- Dark Radiant GemMaterialsInside a Glistening Ancient Relic · Beat the Highly Modified Shadowbeak
- Neutral Radiant GemMaterialsInside a Glistening Ancient Relic · Beat the Beast of Salvation Celesdir
- Revival PotionConsumables · Tech 61Arena First Clear · Treasure map dig spot
- Water Awakening CrystalConsumablesCraft it at an Ancient Workbench
- Electric Awakening CrystalConsumablesCraft it at an Ancient Workbench
- Ground Awakening CrystalConsumablesCraft it at an Ancient Workbench
- Grass Awakening CrystalConsumablesCraft it at an Ancient Workbench
- Fire Awakening CrystalConsumablesCraft it at an Ancient Workbench
- Ice Awakening CrystalConsumablesCraft it at an Ancient Workbench
- Dragon Awakening CrystalConsumablesCraft it at an Ancient Workbench
- Dark Awakening CrystalConsumablesCraft it at an Ancient Workbench
- Neutral Awakening CrystalConsumablesCraft it at an Ancient Workbench
- Vital RemedyConsumablesReward from the Arrogant Pal Critic Fenglope · Craft it at a Medieval Medicine Workbench
- Stamina RemedyConsumablesReward from the Arrogant Pal Critic Broncherry · Craft it at a Medieval Medicine Workbench
- Might RemedyConsumablesReward from the Arrogant Pal Critic Verdash · Craft it at a Medieval Medicine Workbench
- Speed RemedyConsumablesReward from the Arrogant Pal Critic Mammorest · Craft it at a Medieval Medicine Workbench
- Burden RemedyConsumablesReward from the Desert Town Ambassador · Craft it at a Medieval Medicine Workbench
- Vital ElixirConsumablesMission: The Fugitive · Viking dungeon reward
- Stamina ElixirConsumablesMission: A Sweet Deal · Snowfield dungeon reward
- Might ElixirConsumablesMission: Formidable Faleris Aqua · Desert supply caches
- Speed ElixirConsumablesMission: Hunting Essentials · Desert supply caches
- Burden ElixirConsumablesReward from the Arrogant Pal Critic Celesdir · Volcano dungeon reward
- Little Kinship PeachConsumablesMission: Beyond Dimensions · Captured Pal cages
- Kinship PeachConsumablesGather it on the map · Mission: The Knight’s Last Stand
- Life Lotus (S)MaterialsInside a Glistening Ancient Relic · Lv55 oil rig Normal Chest
- Stamina Lotus (S)MaterialsInside a Glistening Ancient Relic · Lv55 oil rig Normal Chest
- Power Lotus (S)MaterialsInside a Glistening Ancient Relic · Lv55 oil rig Normal Chest
- Speed Lotus (S)MaterialsInside a Glistening Ancient Relic · Lv55 oil rig Normal Chest
- Carrying Lotus (S)MaterialsInside a Glistening Ancient Relic · Lv55 oil rig Normal Chest
- Life Lotus (L)MaterialsInside a Glistening Ancient Relic · Lv60 oil rig Greater Chest
- Stamina Lotus (L)MaterialsInside a Glistening Ancient Relic · Lv60 oil rig Greater Chest
- Power Lotus (L)MaterialsInside a Glistening Ancient Relic · Lv60 oil rig Greater Chest
- Speed Lotus (L)MaterialsInside a Glistening Ancient Relic · Lv60 oil rig Greater Chest
- Carrying Lotus (L)MaterialsInside a Glistening Ancient Relic · Lv60 oil rig Greater Chest
- Life FruitConsumablesMission: Medical Bills · Trade for it at the Medal Merchant
- Power FruitConsumablesMission: Hungry for Recruits · Trade for it at the Medal Merchant
- Stout FruitConsumablesMission: Pal's Blessing · Trade for it at the Medal Merchant
- Homeward ThundercloudConsumables · Tech 22Mission: Give a Fuack · Reward from the Desert Town Ambassador
- Starfruit ☆1ConsumablesMission: Wildlife Sanctuaries · Reward from the Arrogant Pal Critic Sekhmet
- Starfruit ☆2ConsumablesMission: No Mercy for Pal Thieves · Reward from the Arrogant Pal Critic Blazamut
- Starfruit ☆3ConsumablesMission: Farewell Under the Sakura Tree · Trade for it at the Medal Merchant
- Starfruit ☆4ConsumablesTrade for it at the Medal Merchant · Inside a Glistening Ancient Relic
- Ripe StarfruitConsumablesMission: The Knight’s Last Stand · Trade for it at the Bounty shop
- Applied Kindling Handbook IConsumablesReward from the Arrogant Gourmet Mammorest Steak · Grassland treasure chests (tier 2)
- Applied Watering Handbook IConsumablesMission: Panthalus · Reward from the Arrogant Pal Critic Lyleen
- Applied Planting Handbook IConsumablesGrassland treasure chests (tier 2) · Trade for it at the Medal Merchant
- Applied Generating Electricity Handbook IConsumablesGrassland treasure chests (tier 2) · Trade for it at the Medal Merchant
- Applied Handiwork Handbook IConsumablesMission: Prove the Legend! · Reward from the Arrogant Pal Critic Faleris Aqua
- Applied Gathering Handbook IConsumablesMission: Give a Fuack · Grassland treasure chests (tier 2)
- Applied Lumbering Handbook IConsumablesGrassland treasure chests (tier 2) · Trade for it at the Medal Merchant
- Applied Mining Handbook IConsumablesMission: Metal on Your Mind · Grassland treasure chests (tier 2)
- Applied Medicine Production Handbook IConsumablesGrassland treasure chests (tier 2) · Trade for it at the Medal Merchant
- Applied Cooling Handbook IConsumablesMission: Lock In · Grassland treasure chests (tier 2)
- Applied Transporting Handbook IConsumablesReward from the Arrogant Pal Critic Kingpaca Cryst · Grassland treasure chests (tier 2)
- Applied Ranching Handbook IConsumablesGrassland treasure chests (tier 2) · Volcano enemy camp sea base reward chest
- Training Manual (S)ConsumablesReward from the Arrogant Pal Critic Direhowl · Grassland treasure chests (tier 1)
- Training Manual (M)ConsumablesReward from the Arrogant Pal Critic Penking · Grassland treasure chests (tier 2)
- Training Manual (L)ConsumablesReward from the Arrogant Pal Critic Fenglope · Volcano treasure chests (tier 2)
- Training Manual (XL)ConsumablesDefeat or catch Mimog · Reward from the Arrogant Pal Critic Sekhmet
- Training CrystalConsumablesBase raid: Syndicate Legends · Trade for it at the Arena shop
- WoodMaterialsChop trees · Buy it from a caravan merchant
- HardwoodMaterialsBuy it from a Wandering Merchant · Defeat or catch Mossanda Lux
- Mythical WoodMaterialsInside a Decayed Ancient Relic · World Tree drop table
- FiberMaterialsDefeat or catch Hoocrates · Craft it at a Crusher
- StoneMaterialsMine rocks · Buy it from a caravan merchant
- Paldium FragmentMaterialsGather it on the map · Buy it from a Wandering Merchant
- OreMaterialsGather it on the map · Reward from the Blacksmith in Training
- CoalMaterialsGather it on the map · Reward from the Blacksmith in Training
- SulfurMaterialsGather it on the map · Defeat or catch Pierdon
- Pure QuartzMaterialsGather it on the map · Reward from the Blacksmith in Training
- Crude OilMaterialsGather it on the map · Reward from the Desert Town Ambassador
- ChromiteMaterialsGather it on the map · Reward from the Arrogant Pal Critic Gildane
- Nightstar SandMaterialsGather it on the map · Defeat or catch Starryon Primo
- Hexolite QuartzMaterialsGather it on the map · Reward from the Arrogant Pal Critic Smokie
- Coralum OreMaterialsSalvage, rank 2 · Sakurajima enemy camp sea base chests
- Meteorite FragmentMaterialsBeat a Xenovader · Defeat or catch Xenolord
- SoraliteMaterialsGather it on the map · Expedition to Sunreach
- PaloxiteMaterialsInside a Decayed Ancient Relic · Gather it on the map
- WoolMaterialsPut Cremis on a Ranch · Defeat or catch Lamball
- LeatherMaterialsDefeat or catch Fuack · Buy it from a Wandering Merchant
- BoneMaterialsPut Vixy on a Ranch · Defeat or catch Vixy
- HornMaterialsBuy it from a Wandering Merchant · Defeat or catch Eikthyrdeer
- Electric OrganMaterialsDefeat or catch Jolthog · Buy it from a Wandering Merchant
- Venom GlandMaterialsDefeat or catch Daedream · Buy it from a Wandering Merchant
- Flame OrganMaterialsPut Flambelle on a Ranch · Defeat or catch Flambelle
- Ice OrganMaterialsDefeat or catch Pengullet · Buy it from a Wandering Merchant
- Aquatic Pal FluidsMaterialsPut Kelpsea on a Ranch · Defeat or catch Fuack
- High Quality Pal OilMaterialsDefeat or catch Flambelle · Buy it from a Wandering Merchant
- Dark FragmentMaterialsBeat a Kitsun Noct · Defeat or catch Starryon
- Ancient BarkMaterialsGather it on the map
- Ancient LavaMaterialsGather it on the map
- Ancient BoneMaterialsGather it on the map
- Decayed Ancient RelicMaterialsBeat the Highly Modified Grizzbolt · Defeat or catch Rayhound Cryst
- Dormant Ancient RelicMaterialsBeat the Highly Modified Grizzbolt · Defeat or catch Rayhound Cryst
- Gorgeous Ancient RelicMaterialsBeat the Highly Modified Grizzbolt · Defeat or catch Rayhound Cryst
- Glowing Ancient RelicMaterialsBeat the Highly Modified Grizzbolt · Defeat or catch Rayhound Cryst
- Glistening Ancient RelicMaterialsBeat the Highly Modified Grizzbolt · Defeat or catch Rayhound Cryst
- World Tree Holy WaterConsumablesDefeat or catch Rayhound Cryst · World Tree rare fishing spots
- Tocotoco FeatherMaterialsBuy it from a caravan merchant · Defeat or catch Tocotoco
- Gumoss LeafMaterialsDefeat or catch Gumoss · Buy it from a caravan merchant
- Penking PlumeMaterialsBuy it from a caravan merchant · Defeat or catch Penking
- Katress HairMaterialsBuy it from a caravan merchant · Defeat or catch Katress
- Ribbuny RibbonMaterialsDefeat or catch Ribbuny · Buy it from a caravan merchant
- Swee HairMaterialsDefeat or catch Swee · Buy it from a caravan merchant
- Killamari TentacleMaterialsBuy it from a caravan merchant · Defeat or catch Killamari
- Dazzi CloudMaterialsBuy it from a caravan merchant · Defeat or catch Dazzi
- Leezpunk CrestMaterialsDefeat or catch Leezpunk · Buy it from a caravan merchant
- Toxin Filtering MembraneMaterialsBeat the Bewitching Lurker Dandilord
- Explosion-Resistant FiberMaterialsBeat the Immortal Shade Silvance
- Ancient Pal ManuscriptMaterialsExpedition to Grassland · Sunreach rare fishing spots
- Dog CoinMaterialsDefeat or catch Mimog · Base raid: Syndicate Patrol
- Ancient Civilization PartsMaterialsBeat the Rowdy Wave Ripper Fuack · Expedition to Grassland
- Ancient Civilization CoreMaterialsBeat the Eclipsed Siren Bellanoir · Expedition to Snowfield
- Predator CoreMaterialsBeat the Rampaging Gorirat
- Successful Bounty TokenMaterialsBeat a Amateur Hunter Hawk
- Battle TicketMaterialsArena First Clear
- Berry SeedsMaterialsDefeat or catch Ribbuny · Buy it from a Wandering Merchant
- Wheat SeedsMaterialsDefeat or catch Lifmunk · Buy it from a Wandering Merchant
- Tomato SeedsMaterialsBuy it from a Wandering Merchant · Defeat or catch Bristla
- Lettuce SeedsMaterialsBuy it from a Wandering Merchant · Defeat or catch Cinnamoth
- Potato SeedsMaterialsBuy it from a caravan merchant · Put Vaelet on a Ranch
- Carrot SeedsMaterialsBuy it from a caravan merchant · Defeat or catch Ribbuny Botan
- Onion SeedsMaterialsBuy it from a caravan merchant · Put Vaelet on a Ranch
- ClothMaterials · Tech 4Defeat or catch Croajiro · Craft it at a High Quality Workbench
- High Quality ClothMaterials · Tech 36Reward from the Desert Town Ambassador · Buy it from a caravan merchant
- Wooden BoardMaterials · Tech 15Craft it at a High Quality Workbench
- High Quality Wooden BoardMaterials · Tech 43Craft it at a Production Assembly Line II
- Mythical Wooden BoardMaterialsCraft it
- NailMaterials · Tech 10Craft it at a High Quality Workbench · Reward from the Arrogant Pal Critic Petallia
- GunpowderMaterials · Tech 21Defeat or catch Tocotoco · Craft it at a High Quality Workbench
- Circuit BoardMaterials · Tech 35Reward from the Arrogant Pal Critic Dogen · Snowfield junk piles
- PolymerMaterials · Tech 33Beat a Brothers of the Eternal Pyre Martyr · Craft it at a Production Assembly Line
- CementMaterials · Tech 19Desert junk piles · Craft it at a High Quality Workbench
- Carbon FiberMaterials · Tech 35Craft it at a Production Assembly Line · Defeat or catch Shadowbeak
- Cryogenic CoolantMaterials · Tech 31Craft it at a Production Assembly Line
- Corrosive SolventMaterials · Tech 37Craft it at a Production Assembly Line
- Bio BatteryMaterials · Tech 44Craft it at a Production Assembly Line II
- Thermal CoreMaterials · Tech 59Craft it at a Production Assembly Line II · Defeat or catch Jetragon
- ComputerMaterials · Tech 50Craft it at a Production Assembly Line II
- AI CoreMaterials · Tech 67Craft it at an Advanced Workshop
- CharcoalMaterialsCraft it at a Primitive Furnace · Reward from the Blacksmith in Training
- IngotMaterialsCraft it at a Primitive Furnace · Reward from the Blacksmith in Training
- Refined IngotMaterialsReward from the Blacksmith in Training · Forest treasure boxes (grade 1)
- Pal Metal IngotMaterialsCraft it at an Electric Furnace
- PlasteelMaterials · Tech 50Reward from the Blacksmith in Training · Craft it at an Electric Furnace
- HexoliteMaterials · Tech 58Craft it at a Gigantic Furnace · Defeat or catch Necromus
- Coralum IngotMaterials · Tech 62Craft it at a Gigantic Furnace
- Soralite IngotMaterials · Tech 66Craft it at an Ancient Furnace
- Paloxite IngotMaterials · Tech 74Craft it at an Ancient Furnace
- Hallowed BarMaterialsYakushima treasure chests · Beat the Eye of Cthulhu
- Common EggEggsPick it up from wild egg spots · Breed it at a Breeding Farm
- Large Common EggEggsPick it up from wild egg spots · Breed it at a Breeding Farm
- Huge Common EggEggsPick it up from wild egg spots · Breed it at a Breeding Farm
- Scorching EggEggsPick it up from wild egg spots · Breed it at a Breeding Farm
- Large Scorching EggEggsPick it up from wild egg spots · Breed it at a Breeding Farm
- Huge Scorching EggEggsPick it up from wild egg spots · Breed it at a Breeding Farm
- Damp EggEggsPick it up from wild egg spots · Breed it at a Breeding Farm
- Large Damp EggEggsPick it up from wild egg spots · Breed it at a Breeding Farm
- Huge Damp EggEggsPick it up from wild egg spots · Breed it at a Breeding Farm
- Verdant EggEggsPick it up from wild egg spots · Breed it at a Breeding Farm
- Large Verdant EggEggsPick it up from wild egg spots · Breed it at a Breeding Farm
- Huge Verdant EggEggsPick it up from wild egg spots · Breed it at a Breeding Farm
- Electric EggEggsPick it up from wild egg spots · Breed it at a Breeding Farm
- Large Electric EggEggsPick it up from wild egg spots · Breed it at a Breeding Farm
- Huge Electric EggEggsPick it up from wild egg spots · Breed it at a Breeding Farm
- Frozen EggEggsGather it on the map · Pick it up from wild egg spots
- Large Frozen EggEggsPick it up from wild egg spots · Breed it at a Breeding Farm
- Huge Frozen EggEggsPick it up from wild egg spots · Breed it at a Breeding Farm
- Rocky EggEggsPick it up from wild egg spots · Breed it at a Breeding Farm
- Large Rocky EggEggsPick it up from wild egg spots · Breed it at a Breeding Farm
- Huge Rocky EggEggsPick it up from wild egg spots · Breed it at a Breeding Farm
- Dark EggEggsPick it up from wild egg spots · Breed it at a Breeding Farm
- Large Dark EggEggsPick it up from wild egg spots · Breed it at a Breeding Farm
- Huge Dark EggEggsPick it up from wild egg spots · Breed it at a Breeding Farm
- Dragon EggEggsBreed it at a Breeding Farm
- Large Dragon EggEggsPick it up from wild egg spots · Breed it at a Breeding Farm
- Huge Dragon EggEggsPick it up from wild egg spots · Breed it at a Breeding Farm
- Mutated EggEggsBreed it at a Breeding Farm
- Large Mutated EggEggsBreed it at a Breeding Farm
- Ominous EggEggsBreed it at a Breeding Farm
- Large Ominous EggEggsBreed it at a Breeding Farm
- Huge Ominous EggEggsBreed it at a Breeding Farm
- RubyMaterialsBuy it from a Wandering Merchant · Defeat or catch Direhowl
- SapphireMaterialsBuy it from a Wandering Merchant · Reward from the Arrogant Pal Critic Carnibora
- EmeraldMaterialsBuy it from a Wandering Merchant · Desert treasure chests (tier 2)
- DiamondMaterialsBuy it from a Wandering Merchant · Reward from the Arrogant Pal Critic Reptyro
- Precious Dragon StoneMaterialsBuy it from a Wandering Merchant · Beat the Winds of Spring Broncherry
- Precious PlumeMaterialsBuy it from a Wandering Merchant · Beat the Plump & Juicy Chikipi
- Precious EntrailsMaterialsBuy it from a Wandering Merchant · Beat the Child of the Deep Kelpsea
- Precious ClawMaterialsBuy it from a Wandering Merchant · Beat the The Cat's Pajamas Cattiva
- Precious PeltMaterialsBuy it from a Wandering Merchant · Beat the Rowdy Wave Ripper Fuack
- Small Pal SoulMaterialsDefeat or catch Finsider · Craft it at a Crusher
- Medium Pal SoulMaterialsCraft it at a Crusher · Reward from the Arrogant Pal Critic Surfent Terra
- Large Pal SoulMaterialsCraft it at a Crusher · Reward from the Arrogant Pal Critic Polapup
- Giant Pal SoulMaterialsCraft it at a Crusher · Reward from the Arrogant Pal Critic Sootseer
- Skill Fruit: Power ShotSkill fruitsGrassland treasure chests (tier 2) · Grassland skill fruit trees
- Skill Fruit: Air CannonSkill fruitsGrassland treasure chests (tier 2) · Grassland skill fruit trees
- Skill Fruit: Air BladeSkill fruitsTrade for it at the Arena shop · Sakurajima skill fruit trees
- Skill Fruit: Power BombSkill fruitsSnowfield treasure chests (tier 2) · Snowfield skill fruit trees
- Skill Fruit: ImplodeSkill fruitsBuy it from a Wandering Merchant · Snowfield treasure chests (tier 2)
- Skill Fruit: Holy BurstSkill fruitsTrade for it at the Arena shop · Inside a Glistening Ancient Relic
- Skill Fruit: Pal BlastSkill fruitsSnowfield treasure chests (tier 2) · Snowfield skill fruit trees
- Grass Skill Fruit: Wind CutterSkill fruitsGrassland treasure chests (tier 2) · Grassland skill fruit trees
- Grass Skill Fruit: Seed Machine GunSkill fruitsGrassland treasure chests (tier 2) · Grassland skill fruit trees
- Grass Skill Fruit: Seed MineSkill fruitsBuy it from a Wandering Merchant · Snowfield treasure chests (tier 2)
- Grass Skill Fruit: Grass TornadoSkill fruitsSnowfield treasure chests (tier 2) · Snowfield skill fruit trees
- Grass Skill Fruit: Spine VineSkill fruitsSnowfield treasure chests (tier 2) · Snowfield skill fruit trees
- Grass Skill Fruit: MulticutterSkill fruitsSakurajima skill fruit trees · Sakurajima fishing spots (tier 2)
- Grass Skill Fruit: Circle VineSkill fruitsSakurajima skill fruit trees · Sakurajima fishing spots (tier 2)
- Grass Skill Fruit: Solar BlastSkill fruitsSnowfield treasure chests (tier 2) · Snowfield skill fruit trees
- Grass Skill Fruit: Reflect LeafSkill fruitsTrade for it at the Arena shop · Inside a Glistening Ancient Relic
- Grass Skill Fruit: CrosswindSkill fruitsTrade for it at the Arena shop · Inside a Glistening Ancient Relic
- Grass Skill Fruit: Wind BlastSkill fruitsTrade for it at the Arena shop · Inside a Glistening Ancient Relic
- Water Skill Fruit: Aqua GunSkill fruitsGrassland treasure chests (tier 2) · Grassland skill fruit trees
- Water Skill Fruit: Hydro JetSkill fruitsGrassland treasure chests (tier 2) · Grassland skill fruit trees
- Water Skill Fruit: Acid RainSkill fruitsBuy it from a Wandering Merchant · Snowfield treasure chests (tier 2)
- Water Skill Fruit: Bubble BlastSkill fruitsSnowfield treasure chests (tier 2) · Snowfield skill fruit trees
- Water Skill Fruit: Aqua BurstSkill fruitsBuy it from a Wandering Merchant · Snowfield treasure chests (tier 2)
- Water Skill Fruit: SplashSkill fruitsSakurajima skill fruit trees · Sakurajima fishing spots (tier 2)
- Water Skill Fruit: Torrential BlastSkill fruitsInside a Glistening Ancient Relic · Sunreach skill fruit trees
- Water Skill Fruit: Curtain SplashSkill fruitsSakurajima skill fruit trees · Sakurajima fishing spots (tier 2)
- Water Skill Fruit: Hydro LaserSkill fruitsSnowfield treasure chests (tier 2) · Snowfield skill fruit trees
- Water Skill Fruit: Hydro SlicerSkill fruitsTrade for it at the Arena shop · Inside a Glistening Ancient Relic
- Water Skill Fruit: Aqua SurgeSkill fruitsTrade for it at the Arena shop · Inside a Glistening Ancient Relic
- Water Skill Fruit: Geyser GushSkill fruitsTrade for it at the Arena shop · Inside a Glistening Ancient Relic
- Fire Skill Fruit: Ignis BlastSkill fruitsGrassland treasure chests (tier 2) · Grassland skill fruit trees
- Fire Skill Fruit: Flare ArrowSkill fruitsGrassland treasure chests (tier 2) · Grassland skill fruit trees
- Fire Skill Fruit: Spirit FireSkill fruitsGrassland treasure chests (tier 2) · Grassland skill fruit trees
- Fire Skill Fruit: Ignis BreathSkill fruitsBuy it from a Wandering Merchant · Snowfield treasure chests (tier 2)
- Fire Skill Fruit: Flare StormSkill fruitsBuy it from a Wandering Merchant · Snowfield treasure chests (tier 2)
- Fire Skill Fruit: Flame WallSkill fruitsSakurajima skill fruit trees · Sakurajima fishing spots (tier 2)
- Fire Skill Fruit: Flame FunnelSkill fruitsTrade for it at the Arena shop · Inside a Glistening Ancient Relic
- Fire Skill Fruit: Fire BallSkill fruitsSnowfield treasure chests (tier 2) · Snowfield skill fruit trees
- Fire Skill Fruit: Ignis RageSkill fruitsSnowfield treasure chests (tier 2) · Snowfield skill fruit trees
- Fire Skill Fruit: Volcanic RainSkill fruitsTrade for it at the Arena shop · Sakurajima skill fruit trees
- Electric Skill Fruit: ShockwaveSkill fruitsGrassland treasure chests (tier 2) · Grassland skill fruit trees
- Electric Skill Fruit: Plasma FunnelSkill fruitsGrassland treasure chests (tier 2) · Grassland skill fruit trees
- Electric Skill Fruit: Spark BlastSkill fruitsGrassland treasure chests (tier 2) · Grassland skill fruit trees
- Electric Skill Fruit: Electric BallSkill fruitsGrassland treasure chests (tier 2) · Desert skill fruit trees
- Electric Skill Fruit: Lightning StreakSkill fruitsGrassland treasure chests (tier 2) · Grassland skill fruit trees
- Electric Skill Fruit: Lock-on LaserSkill fruitsBuy it from a Wandering Merchant · Snowfield treasure chests (tier 2)
- Electric Skill Fruit: Tri-LightningSkill fruitsSnowfield treasure chests (tier 2) · Snowfield skill fruit trees
- Electric Skill Fruit: TriSparkSkill fruitsSakurajima skill fruit trees · Sakurajima fishing spots (tier 2)
- Electric Skill Fruit: Lightning BoltSkill fruitsSnowfield treasure chests (tier 2) · Snowfield skill fruit trees
- Electric Skill Fruit: Lightning StrikeSkill fruitsSnowfield treasure chests (tier 2) · Snowfield skill fruit trees
- Electric Skill Fruit: Thunder RainSkill fruitsTrade for it at the Arena shop · Sakurajima skill fruit trees
- Electric Skill Fruit: ThunderstormSkill fruitsTrade for it at the Arena shop · Sakurajima skill fruit trees
- Thunder Skill Fruit: All Range ThunderSkill fruitsTrade for it at the Arena shop · Inside a Glistening Ancient Relic
- Ground Skill Fruit: Stone CannonSkill fruitsBuy it from a Wandering Merchant · Grassland treasure chests (tier 2)
- Ground Skill Fruit: Bog BlastSkill fruitsGrassland treasure chests (tier 2) · Grassland skill fruit trees
- Ground Skill Fruit: Stone BlastSkill fruitsSnowfield treasure chests (tier 2) · Snowfield skill fruit trees
- Ground Skill Fruit: Sand TornadoSkill fruitsBuy it from a Wandering Merchant · Snowfield treasure chests (tier 2)
- Ground Skill Fruit: Sand TwisterSkill fruitsTrade for it at the Arena shop · Sakurajima skill fruit trees
- Ground Skill Fruit: Rock LanceSkill fruitsSnowfield treasure chests (tier 2) · Snowfield skill fruit trees
- Ground Skill Fruit: RockburstSkill fruitsTrade for it at the Arena shop · Sakurajima skill fruit trees
- Ground Skill Fruit: Rocky ImpactSkill fruitsTrade for it at the Arena shop · Inside a Glistening Ancient Relic
- Ice Skill Fruit: Ice MissileSkill fruitsGrassland treasure chests (tier 2) · Grassland skill fruit trees
- Ice Skill Fruit: Icicle CutterSkill fruitsGrassland treasure chests (tier 2) · Grassland skill fruit trees
- Ice Skill Fruit: IcebergSkill fruitsSnowfield treasure chests (tier 2) · Snowfield skill fruit trees
- Ice Skill Fruit: Crystal BreathSkill fruitsSnowfield treasure chests (tier 2) · Snowfield skill fruit trees
- Ice Skill Fruit: Freeze WallSkill fruitsTrade for it at the Arena shop · Inside a Glistening Ancient Relic
- Ice Skill Fruit: Icicle BulletSkill fruitsTrade for it at the Arena shop
- Ice Skill Fruit: Icicle LineSkill fruitsSakurajima skill fruit trees · Sakurajima fishing spots (tier 2)
- Ice Skill Fruit: Blizzard SpikeSkill fruitsSnowfield treasure chests (tier 2) · Snowfield skill fruit trees
- Ice Skill Fruit: Diamond RainSkill fruitsSakurajima skill fruit trees · Sakurajima fishing spots (tier 2)
- Ice Skill Fruit: Absolute FrostSkill fruitsTrade for it at the Arena shop · Inside a Glistening Ancient Relic
- Dark Skill Fruit: Shadow BurstSkill fruitsGrassland treasure chests (tier 2) · Grassland skill fruit trees
- Dark Skill Fruit: Poison BlastSkill fruitsSnowfield treasure chests (tier 2) · Snowfield skill fruit trees
- Dark Skill Fruit: Spirit FlameSkill fruitsGrassland treasure chests (tier 2) · Grassland skill fruit trees
- Dark Skill Fruit: Dark CannonSkill fruitsSakurajima skill fruit trees · Sakurajima fishing spots (tier 2)
- Dark Skill Fruit: Umbral SurgeSkill fruitsSakurajima skill fruit trees · Sakurajima fishing spots (tier 2)
- Dark Skill Fruit: Nightmare BallSkill fruitsSnowfield treasure chests (tier 2) · Snowfield skill fruit trees
- Dark Skill Fruit: Dark ArrowSkill fruitsSakurajima skill fruit trees · Sakurajima fishing spots (tier 2)
- Dark Skill Fruit: Dark LaserSkill fruitsSnowfield treasure chests (tier 2) · Snowfield skill fruit trees
- Dark Skill Fruit: ApocalypseSkill fruitsTrade for it at the Arena shop · Beat the Eclipsed Siren Bellanoir
- Dark Skill Fruit: Dark WhispSkill fruitsTrade for it at the Arena shop · Beat the Twilight Siren Bellanoir Libero
- Dark Skill Fruit: Poison ShowerSkill fruitsTrade for it at the Arena shop · Inside a Glistening Ancient Relic
- Dark Skill Fruit: Psycho GravitySkill fruitsBeat the Blightstar Calamity Zenara & Astralym
- Dragon Skill Fruit: Dragon CannonSkill fruitsGrassland treasure chests (tier 2) · Grassland skill fruit trees
- Dragon Skill Fruit: Dragon BurstSkill fruitsSnowfield treasure chests (tier 2) · Snowfield skill fruit trees
- Dragon Skill Fruit: Dragon BreathSkill fruitsSnowfield treasure chests (tier 2) · Snowfield skill fruit trees
- Dragon Skill Fruit: Comet StrikeSkill fruitsSakurajima skill fruit trees · Sakurajima fishing spots (tier 2)
- Dragon Skill Fruit: Blast CannonSkill fruitsSakurajima skill fruit trees · Sakurajima fishing spots (tier 2)
- Dragon Skill Fruit: Dragon MeteorSkill fruitsSnowfield treasure chests (tier 2) · Snowfield skill fruit trees
- Dragon Skill Fruit: Beam SlicerSkill fruitsTrade for it at the Arena shop · Sakurajima skill fruit trees
- Dragon Skill Fruit: Charge CannonSkill fruitsTrade for it at the Arena shop · Inside a Glistening Ancient Relic
- Pal ReverserConsumablesDesert enemy camp sea base chests · Trade for it at the Bounty shop
- Implant: SerenityKey itemsTrade for it at the Arena shop
- Implant: Infinite StaminaKey itemsTrade for it at the Arena shop
- Implant: RunnerKey itemsTrade for it at the Arena shop
- Implant: Burly BodyKey itemsTrade for it at the Bounty shop
- Implant: ArtisanKey itemsTrade for it at the Bounty shop
- Implant: MuscleheadKey itemsTrade for it at the Bounty shop
- Implant: VanguardKey itemsTrade for it at the Bounty shop
- Implant: Stronghold StrategistKey itemsTrade for it at the Bounty shop
- Implant: Motivational LeaderKey itemsTrade for it at the Bounty shop
- Implant: NobleKey itemsTrade for it at the Arena shop
- Implant: Ace SwimmerKey itemsTrade for it at the Arena shop
- Implant: Wellness WatcherKey itemsTrade for it at the Bounty shop
- Implant: Healing CoachKey itemsTrade for it at the Arena shop
- Implant: Reload MasterKey itemsTrade for it at the Arena shop
- Disposable Implant: Twin-Edged Holy BladeDisposable implantsInside a Glistening Ancient Relic
- Disposable Implant: Sanctified Meat ShieldDisposable implantsInside a Glistening Ancient Relic
- Disposable Implant: Demon’s HandDisposable implantsInside a Glistening Ancient Relic
- Disposable Implant: World Tree's BountyDisposable implantsInside a Glistening Ancient Relic
- Disposable Implant: Hermit SageDisposable implantsInside a Glistening Ancient Relic
- Disposable Implant: Dimensional LeapDisposable implantsInside a Glistening Ancient Relic
- Disposable Implant: God of DestructionDisposable implantsInside a Glistening Ancient Relic
- Disposable Implant: Remarkable CraftsmanshipDisposable implantsInside a Glistening Ancient Relic
- Disposable Implant: Diamond BodyDisposable implantsInside a Glistening Ancient Relic
- Disposable Implant: Demon GodDisposable implantsInside a Glistening Ancient Relic
- Disposable Implant: Mastery of FastingDisposable implantsAncient Ruin · Inside a Glistening Ancient Relic
- Disposable Implant: Heart of the Immovable KingDisposable implantsAncient Ruin · Inside a Glistening Ancient Relic
- Disposable Implant: SwiftDisposable implantsAncient Ruin · Inside a Glistening Ancient Relic
- Disposable Implant: Eternal EngineDisposable implantsInside a Glistening Ancient Relic
- Disposable Implant: VampiricDisposable implantsInside a Glistening Ancient Relic
- Disposable Implant: King of the WavesDisposable implantsInside a Glistening Ancient Relic
- Disposable Implant: BabysitterDisposable implantsInside a Glistening Ancient Relic
- Disposable Implant: IdiosyncraticDisposable implantsInside a Glistening Ancient Relic
- Disposable Implant: ImmortalityDisposable implantsInside a Glistening Ancient Relic
- Disposable Implant: Heavily ArmoredDisposable implantsInside a Glistening Ancient Relic
- Disposable Implant: Sky StriderDisposable implantsInside a Glistening Ancient Relic
- Advanced Technical ManualConsumablesDefeat or catch Hoocrates · Reward from the Arrogant Pal Critic Kingpaca
- Innovative Technical ManualConsumablesVolcano treasure chests (tier 2) · Desert dungeon reward
- Futuristic Technical ManualConsumablesReward from the Arrogant Pal Critic Wumpo · Snowfield treasure chests (tier 2)
- Ancient Technical ManualConsumablesReward from the Arrogant Pal Critic Vanwyrm · Snowfield treasure chests (tier 2)
- Copper KeyConsumablesDefeat or catch Leezpunk · Reward from the Arrogant Pal Critic Lifmunk
- Silver KeyConsumablesDefeat or catch Leezpunk · Reward from the Arrogant Pal Critic Kingpaca
- Gold KeyConsumablesReward from the Arrogant Pal Critic Hangyu Cryst · Beat a Black Marketeer
- Fishing MagnetConsumablesCraft it at a High Quality Workbench · Gather it on the map
- Aquatic Construction KitKey items · Tech 23Craft it at a High Quality Workbench
- Metal Bat Schematic 1SchematicsDesert treasure chests (tier 2) · Desert fishing spots (tier 2)
- Metal Bat Schematic 2SchematicsDesert treasure chests (tier 2) · Desert fishing spots (tier 2)
- Metal Bat Schematic 3SchematicsDesert treasure chests (tier 2) · Desert fishing spots (tier 2)
- Metal Bat Schematic 4SchematicsDesert treasure chests (tier 2) · Desert fishing spots (tier 2)
- Lily's Spear Schematic 4SchematicsTrade for it at the Medal Merchant
- Enhanced Lily's Spear Schematic 4SchematicsTrade for it at the Medal Merchant
- Sword Schematic 1SchematicsForest treasure chests (tier 2) · Forest fishing spots (tier 2)
- Sword Schematic 2SchematicsForest treasure chests (tier 2) · Forest fishing spots (tier 2)
- Sword Schematic 3SchematicsForest treasure chests (tier 2) · Forest fishing spots (tier 2)
- Sword Schematic 4SchematicsForest treasure chests (tier 2) · Forest fishing spots (tier 2)
- Katana Schematic 1SchematicsDesert treasure chests (tier 2) · Desert fishing spots (tier 2)
- Katana Schematic 2SchematicsDesert treasure chests (tier 2) · Desert fishing spots (tier 2)
- Katana Schematic 3SchematicsDesert treasure chests (tier 2) · Desert fishing spots (tier 2)
- Katana Schematic 4SchematicsDesert treasure chests (tier 2) · Desert fishing spots (tier 2)
- Beam Sword Schematic 1SchematicsSakurajima enemy camp sea base chests · Feybreak treasure chests (tier 2)
- Beam Sword Schematic 2SchematicsSakurajima enemy camp sea base chests · Craft it at a Drafting Table
- Beam Sword Schematic 3SchematicsSakurajima enemy camp sea base chests · Craft it at a Drafting Table
- Beam Sword Schematic 4SchematicsSakurajima enemy camp sea base chests · Craft it at a Drafting Table
- Laser Sword Schematic 1SchematicsSunreach enemy camp reward chest · Sunreach treasure chests
- Laser Sword Schematic 2SchematicsCraft it at a Drafting Table · Treasure map dig spot
- Laser Sword Schematic 3SchematicsCraft it at a Drafting Table · Feybreak enemy camp sea base reward chest
- Laser Sword Schematic 4SchematicsCraft it at a Drafting Table · Feybreak enemy camp sea base reward chest
- Old Bow Schematic 1SchematicsGrassland chests at NPC spots (tier 1) · Grassland fishing spots (tier 1)
- Old Bow Schematic 2SchematicsGrassland chests at NPC spots (tier 1) · Grassland fishing spots (tier 1)
- Old Bow Schematic 3SchematicsGrassland chests at NPC spots (tier 1) · Grassland fishing spots (tier 1)
- Old Bow Schematic 4SchematicsGrassland chests at NPC spots (tier 1) · Grassland fishing spots (tier 1)
- Crossbow Schematic 1SchematicsGrassland treasure chests (tier 2) · Grassland fishing spots (tier 2)
- Crossbow Schematic 2SchematicsGrassland treasure chests (tier 2) · Grassland fishing spots (tier 2)
- Crossbow Schematic 3SchematicsGrassland treasure chests (tier 2) · Grassland fishing spots (tier 2)
- Crossbow Schematic 4SchematicsGrassland treasure chests (tier 2) · Grassland fishing spots (tier 2)
- Poison Arrow Crossbow Schematic 1SchematicsNo known source in 1.0.5
- Poison Arrow Crossbow Schematic 2SchematicsCraft it
- Poison Arrow Crossbow Schematic 3SchematicsCraft it
- Poison Arrow Crossbow Schematic 4SchematicsCraft it
- Fire Arrow Crossbow Schematic 1SchematicsNo known source in 1.0.5
- Fire Arrow Crossbow Schematic 2SchematicsCraft it
- Fire Arrow Crossbow Schematic 3SchematicsCraft it
- Fire Arrow Crossbow Schematic 4SchematicsCraft it
- Compound Bow Schematic 1SchematicsSnowfield treasure chests (tier 2) · Snowfield fishing spots (tier 2)
- Compound Bow Schematic 2SchematicsSnowfield treasure chests (tier 2) · Snowfield fishing spots (tier 2)
- Compound Bow Schematic 3SchematicsSnowfield treasure chests (tier 2) · Snowfield fishing spots (tier 2)
- Compound Bow Schematic 4SchematicsSnowfield treasure chests (tier 2) · Snowfield fishing spots (tier 2)
- Advanced Bow Schematic 1SchematicsSakurajima enemy camp sea base chests · Feybreak treasure chests (tier 2)
- Advanced Bow Schematic 2SchematicsSakurajima enemy camp sea base chests · Craft it at a Drafting Table
- Advanced Bow Schematic 3SchematicsSakurajima enemy camp sea base chests · Craft it at a Drafting Table
- Advanced Bow Schematic 4SchematicsSakurajima enemy camp sea base chests · Craft it at a Drafting Table
- Mechanical Bow Schematic 1SchematicsSunreach enemy camp chests · Sunreach treasure chests
- Mechanical Bow Schematic 2SchematicsCraft it at a Drafting Table · Treasure map dig spot
- Mechanical Bow Schematic 3SchematicsCraft it at a Drafting Table · Treasure map dig spot
- Mechanical Bow Schematic 4SchematicsCraft it at a Drafting Table · Treasure map dig spot
- Makeshift Handgun Schematic 1SchematicsGrassland treasure chests (tier 2) · Grassland fishing spots (tier 2)
- Makeshift Handgun Schematic 2SchematicsGrassland treasure chests (tier 2) · Grassland fishing spots (tier 2)
- Makeshift Handgun Schematic 3SchematicsGrassland treasure chests (tier 2) · Grassland fishing spots (tier 2)
- Makeshift Handgun Schematic 4SchematicsGrassland treasure chests (tier 2) · Grassland fishing spots (tier 2)
- Handgun Schematic 1SchematicsVolcano treasure chests (tier 1) · Forest fishing spots (tier 2)
- Handgun Schematic 2SchematicsVolcano treasure chests (tier 1) · Forest fishing spots (tier 2)
- Handgun Schematic 3SchematicsVolcano treasure chests (tier 1) · Forest fishing spots (tier 2)
- Handgun Schematic 4SchematicsVolcano treasure chests (tier 1) · Forest fishing spots (tier 2)
- Old Revolver Schematic 1SchematicsVolcano treasure chests (tier 1) · Desert fishing spots (tier 2)
- Old Revolver Schematic 2SchematicsVolcano treasure chests (tier 1) · Desert fishing spots (tier 2)
- Old Revolver Schematic 3SchematicsVolcano treasure chests (tier 1) · Desert fishing spots (tier 2)
- Old Revolver Schematic 4SchematicsVolcano treasure chests (tier 1) · Desert fishing spots (tier 2)
- Makeshift Shotgun Schematic 1SchematicsForest treasure chests (tier 2) · Forest fishing spots (tier 2)
- Makeshift Shotgun Schematic 2SchematicsForest treasure chests (tier 2) · Forest fishing spots (tier 2)
- Makeshift Shotgun Schematic 3SchematicsForest treasure chests (tier 2) · Forest fishing spots (tier 2)
- Makeshift Shotgun Schematic 4SchematicsForest treasure chests (tier 2) · Forest fishing spots (tier 2)
- Double-Barreled Shotgun Schematic 1SchematicsForest treasure chests (tier 2) · Forest fishing spots (tier 2)
- Double-Barreled Shotgun Schematic 2SchematicsForest treasure chests (tier 2) · Forest fishing spots (tier 2)
- Double-Barreled Shotgun Schematic 3SchematicsForest treasure chests (tier 2) · Forest fishing spots (tier 2)
- Double-Barreled Shotgun Schematic 4SchematicsForest treasure chests (tier 2) · Forest fishing spots (tier 2)
- Pump-Action Shotgun Schematic 1SchematicsDesert treasure chests (tier 2) · Desert fishing spots (tier 2)
- Pump-Action Shotgun Schematic 2SchematicsDesert treasure chests (tier 2) · Desert fishing spots (tier 2)
- Pump-Action Shotgun Schematic 3SchematicsDesert treasure chests (tier 2) · Desert fishing spots (tier 2)
- Pump-Action Shotgun Schematic 4SchematicsDesert treasure chests (tier 2) · Desert fishing spots (tier 2)
- Semi-Auto Shotgun Schematic 1SchematicsSnowfield treasure chests (tier 2) · Snowfield fishing spots (tier 2)
- Semi-Auto Shotgun Schematic 2SchematicsMission: Easygoing Adventures · Snowfield treasure chests (tier 2)
- Semi-Auto Shotgun Schematic 3SchematicsSnowfield treasure chests (tier 2) · Snowfield fishing spots (tier 2)
- Semi-Auto Shotgun Schematic 4SchematicsSnowfield treasure chests (tier 2) · Snowfield fishing spots (tier 2)
- Energy Shotgun Schematic 1SchematicsFeybreak fishing spots (tier 2)
- Energy Shotgun Schematic 2SchematicsCraft it at a Drafting Table · Treasure map dig spot
- Energy Shotgun Schematic 3SchematicsTrade for it at the Arena shop · Sakurajima enemy camp sea base reward chest
- Energy Shotgun Schematic 4SchematicsTrade for it at the Arena shop · Sakurajima enemy camp sea base reward chest
- Prototype Shotgun Schematic 1SchematicsSunreach treasure chests · Sunreach fishing spots (tier 2)
- Prototype Shotgun Schematic 2SchematicsCraft it at a Drafting Table · Treasure map dig spot
- Prototype Shotgun Schematic 3SchematicsCraft it at a Drafting Table · Treasure map dig spot
- Prototype Shotgun Schematic 4SchematicsCraft it at a Drafting Table · Treasure map dig spot
- Beam Scatter Schematic 1SchematicsInside a Glistening Ancient Relic · World Tree fishing spots (tier 2)
- Beam Scatter Schematic 2SchematicsCraft it at a Drafting Table · Treasure map dig spot
- Beam Scatter Schematic 3SchematicsCraft it at a Drafting Table · Treasure map dig spot
- Beam Scatter Schematic 4SchematicsCraft it at a Drafting Table · Treasure map dig spot
- Musket Schematic 1SchematicsForest treasure chests (tier 2) · Grassland fishing spots (tier 2)
- Musket Schematic 2SchematicsForest treasure chests (tier 2) · Grassland fishing spots (tier 2)
- Musket Schematic 3SchematicsForest treasure chests (tier 2) · Grassland fishing spots (tier 2)
- Musket Schematic 4SchematicsForest treasure chests (tier 2) · Grassland fishing spots (tier 2)
- Single-Shot Rifle Schematic 1SchematicsForest treasure chests (tier 2) · Forest fishing spots (tier 2)
- Single-Shot Rifle Schematic 2SchematicsForest treasure chests (tier 2) · Forest fishing spots (tier 2)
- Single-Shot Rifle Schematic 3SchematicsForest treasure chests (tier 2) · Forest fishing spots (tier 2)
- Single-Shot Rifle Schematic 4SchematicsForest treasure chests (tier 2) · Forest fishing spots (tier 2)
- Semi-Auto Rifle Schematic 1SchematicsVolcano treasure chests (tier 2) · Volcano fishing spots (tier 2)
- Semi-Auto Rifle Schematic 2SchematicsVolcano treasure chests (tier 2) · Volcano fishing spots (tier 2)
- Semi-Auto Rifle Schematic 3SchematicsVolcano treasure chests (tier 2) · Volcano fishing spots (tier 2)
- Semi-Auto Rifle Schematic 4SchematicsVolcano treasure chests (tier 2) · Volcano fishing spots (tier 2)
- Makeshift Assault Rifle Schematic 1SchematicsForest treasure chests (tier 2) · Forest fishing spots (tier 2)
- Makeshift Assault Rifle Schematic 2SchematicsForest treasure chests (tier 2) · Forest fishing spots (tier 2)
- Makeshift Assault Rifle Schematic 3SchematicsForest treasure chests (tier 2) · Forest fishing spots (tier 2)
- Makeshift Assault Rifle Schematic 4SchematicsForest treasure chests (tier 2) · Forest fishing spots (tier 2)
- Heavy Assault Rifle Schematic 1SchematicsSunreach supply caches · Sunreach enemy camp reward chest
- Heavy Assault Rifle Schematic 2SchematicsCraft it at a Drafting Table · Treasure map dig spot
- Heavy Assault Rifle Schematic 3SchematicsCraft it at a Drafting Table · Feybreak enemy camp sea base reward chest
- Heavy Assault Rifle Schematic 4SchematicsCraft it at a Drafting Table · Feybreak enemy camp sea base reward chest
- Plasma Rifle Schematic 1SchematicsInside a Glistening Ancient Relic · World Tree fishing spots (tier 2)
- Plasma Rifle Schematic 2SchematicsCraft it at a Drafting Table · Treasure map dig spot
- Plasma Rifle Schematic 3SchematicsCraft it at a Drafting Table · Treasure map dig spot
- Plasma Rifle Schematic 4SchematicsCraft it at a Drafting Table · Treasure map dig spot
- Makeshift SMG Schematic 1SchematicsGrassland treasure chests (tier 2) · Grassland fishing spots (tier 2)
- Makeshift SMG Schematic 2SchematicsGrassland treasure chests (tier 2) · Grassland fishing spots (tier 2)
- Makeshift SMG Schematic 3SchematicsGrassland treasure chests (tier 2) · Grassland fishing spots (tier 2)
- Makeshift SMG Schematic 4SchematicsGrassland treasure chests (tier 2) · Grassland fishing spots (tier 2)
- SMG Schematic 1SchematicsForest treasure chests (tier 2) · Forest fishing spots (tier 2)
- SMG Schematic 2SchematicsForest treasure chests (tier 2) · Forest fishing spots (tier 2)
- SMG Schematic 3SchematicsForest treasure chests (tier 2) · Forest fishing spots (tier 2)
- SMG Schematic 4SchematicsForest treasure chests (tier 2) · Forest fishing spots (tier 2)
- Combat SMG Schematic 1SchematicsSunreach treasure chests · Sunreach fishing spots (tier 2)
- Combat SMG Schematic 2SchematicsCraft it at a Drafting Table · Treasure map dig spot
- Combat SMG Schematic 3SchematicsCraft it at a Drafting Table · Treasure map dig spot
- Combat SMG Schematic 4SchematicsCraft it at a Drafting Table · Treasure map dig spot
- Rocket Launcher Schematic 1SchematicsFeybreak treasure chests · Sunreach supply caches
- Rocket Launcher Schematic 2SchematicsMission: Easygoing Adventures · Craft it at a Drafting Table
- Rocket Launcher Schematic 3SchematicsCraft it at a Drafting Table · Treasure map dig spot
- Rocket Launcher Schematic 4SchematicsCraft it at a Drafting Table · Treasure map dig spot
- Meteor Launcher Schematic 4SchematicsArena First Clear
- Laser Rifle Schematic 1SchematicsSnowfield enemy camp reward chest · Salvage, rank 2
- Laser Rifle Schematic 2SchematicsSnowfield enemy camp sea base reward chest · Salvage, rank 2
- Laser Rifle Schematic 3SchematicsSnowfield enemy camp sea base reward chest · Salvage, rank 2
- Laser Rifle Schematic 4SchematicsSnowfield enemy camp sea base reward chest · Salvage, rank 2
- Charge Rifle Schematic 1SchematicsFeybreak fishing spots (tier 2)
- Charge Rifle Schematic 2SchematicsCraft it at a Drafting Table · Treasure map dig spot
- Charge Rifle Schematic 3SchematicsTrade for it at the Arena shop · Sakurajima enemy camp sea base reward chest
- Charge Rifle Schematic 4SchematicsTrade for it at the Arena shop · Sakurajima enemy camp sea base reward chest
- Overheat Rifle Schematic 1SchematicsFeybreak fishing spots (tier 2)
- Overheat Rifle Schematic 2SchematicsCraft it at a Drafting Table · Treasure map dig spot
- Overheat Rifle Schematic 3SchematicsTrade for it at the Arena shop · Sakurajima enemy camp sea base reward chest
- Overheat Rifle Schematic 4SchematicsTrade for it at the Arena shop · Sakurajima enemy camp sea base reward chest
- Flamethrower Schematic 1SchematicsSalvage, rank 2 · Sakurajima fishing spots (tier 2)
- Flamethrower Schematic 2SchematicsMission: Sparkly and Smooth · Salvage, rank 2
- Flamethrower Schematic 3SchematicsSalvage, rank 2 · Sakurajima fishing spots (tier 2)
- Flamethrower Schematic 4SchematicsSalvage, rank 2 · Sakurajima fishing spots (tier 2)
- Gatling Gun Schematic 1SchematicsSakurajima enemy camp reward chest · Lv55 oil rig Greater Chest
- Gatling Gun Schematic 2SchematicsSakurajima enemy camp reward chest · Craft it at a Drafting Table
- Gatling Gun Schematic 3SchematicsSakurajima enemy camp reward chest · Craft it at a Drafting Table
- Gatling Gun Schematic 4SchematicsSakurajima enemy camp reward chest · Craft it at a Drafting Table
- Laser Gatling Gun Schematic 1SchematicsSakurajima enemy camp sea base chests · Feybreak treasure chests (tier 2)
- Laser Gatling Gun Schematic 2SchematicsSakurajima enemy camp sea base chests · Craft it at a Drafting Table
- Laser Gatling Gun Schematic 3SchematicsSakurajima enemy camp sea base chests · Craft it at a Drafting Table
- Laser Gatling Gun Schematic 4SchematicsBeat the Unyielding Colossus Warsect · Sakurajima enemy camp sea base chests
- Grenade Launcher Schematic 1SchematicsSakurajima enemy camp reward chest · Feybreak supply caches
- Grenade Launcher Schematic 2SchematicsMission: A True Ascent Ends in Descent · Sakurajima enemy camp reward chest
- Grenade Launcher Schematic 3SchematicsSakurajima enemy camp reward chest · Craft it at a Drafting Table
- Grenade Launcher Schematic 4SchematicsSakurajima enemy camp reward chest · Craft it at a Drafting Table
- Tactical Grenade Launcher Schematic 1SchematicsSunreach supply caches · Sunreach enemy camp reward chest
- Tactical Grenade Launcher Schematic 2SchematicsCraft it at a Drafting Table · Treasure map dig spot
- Tactical Grenade Launcher Schematic 3SchematicsCraft it at a Drafting Table · Feybreak enemy camp sea base reward chest
- Tactical Grenade Launcher Schematic 4SchematicsCraft it at a Drafting Table · Feybreak enemy camp sea base reward chest
- Guided Missile Launcher Schematic 1SchematicsSakurajima enemy camp reward chest · Lv55 oil rig Greater Chest
- Guided Missile Launcher Schematic 2SchematicsSakurajima enemy camp reward chest · Craft it at a Drafting Table
- Guided Missile Launcher Schematic 3SchematicsSakurajima enemy camp reward chest · Craft it at a Drafting Table
- Guided Missile Launcher Schematic 4SchematicsSakurajima enemy camp reward chest · Craft it at a Drafting Table
- Multi Guided Missile Launcher SchematicSchematicsLv55 oil rig Greater Chest
- Multi Guided Missile Launcher Schematic 1SchematicsCraft it at a Drafting Table · Lv55 oil rig Greater Chest
- Multi Guided Missile Launcher Schematic 2SchematicsCraft it at a Drafting Table · Lv60 oil rig Greater Chest
- Multi Guided Missile Launcher Schematic 3SchematicsCraft it at a Drafting Table · Lv60 oil rig Greater Chest
- Multi Guided Missile Launcher Schematic 4SchematicsCraft it at a Drafting Table · Lv60 oil rig Greater Chest
- Plasma Cannon Schematic 1SchematicsFeybreak treasure chests (tier 2) · Feybreak fishing spots (tier 2)
- Plasma Cannon Schematic 2SchematicsCraft it at a Drafting Table · Lv60 oil rig Greater Chest
- Plasma Cannon Schematic 3SchematicsCraft it at a Drafting Table · Lv60 oil rig Greater Chest
- Plasma Cannon Schematic 4SchematicsCraft it at a Drafting Table · Beat the Legendary Steed of Ice Frostallion
- Beam Launcher Schematic 1SchematicsInside a Glistening Ancient Relic · World Tree fishing spots (tier 2)
- Beam Launcher Schematic 2SchematicsCraft it at a Drafting Table · Treasure map dig spot
- Beam Launcher Schematic 3SchematicsCraft it at a Drafting Table · Treasure map dig spot
- Beam Launcher Schematic 4SchematicsCraft it at a Drafting Table · Treasure map dig spot
- Drone Launcher Schematic 1SchematicsInside a Glistening Ancient Relic · World Tree fishing spots (tier 2)
- Drone Launcher Schematic 2SchematicsCraft it at a Drafting Table · Treasure map dig spot
- Drone Launcher Schematic 3SchematicsCraft it at a Drafting Table · Treasure map dig spot
- Drone Launcher Schematic 4SchematicsCraft it at a Drafting Table · Treasure map dig spot
- Excalibur SchematicSchematicsYakushima treasure chests
- Excalibur Schematic 1SchematicsCraft it at a Drafting Table · Yakushima treasure chests
- Excalibur Schematic 2SchematicsCraft it at a Drafting Table · Yakushima treasure chests
- Excalibur Schematic 3SchematicsCraft it at a Drafting Table · Yakushima treasure chests
- Excalibur Schematic 4SchematicsCraft it at a Drafting Table · Yakushima treasure chests
- Terra Blade SchematicSchematicsYakushima treasure chests (tier 2)
- Terra Blade Schematic 1SchematicsCraft it at a Drafting Table · Yakushima treasure chests (tier 2)
- Terra Blade Schematic 2SchematicsMission: Beyond Dimensions · Craft it at a Drafting Table
- Terra Blade Schematic 3SchematicsCraft it at a Drafting Table · Yakushima treasure chests (tier 2)
- Terra Blade Schematic 4SchematicsCraft it at a Drafting Table · Yakushima treasure chests (tier 2)
- Vortex Beater SchematicSchematicsYakushima treasure chests (tier 2)
- Vortex Beater Schematic 1SchematicsCraft it at a Drafting Table · Yakushima treasure chests (tier 2)
- Vortex Beater Schematic 2SchematicsCraft it at a Drafting Table · Yakushima treasure chests (tier 2)
- Vortex Beater Schematic 3SchematicsCraft it at a Drafting Table · Yakushima treasure chests (tier 2)
- Vortex Beater Schematic 4SchematicsCraft it at a Drafting Table · Yakushima treasure chests (tier 2)
- Nightglow SchematicSchematicsYakushima treasure chests (tier 2)
- Nightglow Schematic 1SchematicsCraft it at a Drafting Table · Yakushima treasure chests (tier 2)
- Nightglow Schematic 2SchematicsCraft it at a Drafting Table · Yakushima treasure chests (tier 2)
- Nightglow Schematic 3SchematicsCraft it at a Drafting Table · Yakushima treasure chests (tier 2)
- Nightglow Schematic 4SchematicsCraft it at a Drafting Table · Yakushima treasure chests (tier 2)
- Terraprisma SchematicSchematicsYakushima treasure chests (tier 2)
- Terraprisma Schematic 1SchematicsCraft it at a Drafting Table · Yakushima treasure chests (tier 2)
- Terraprisma Schematic 2SchematicsMission: From the Far Side of the Moon · Craft it at a Drafting Table
- Terraprisma Schematic 3SchematicsCraft it at a Drafting Table · Yakushima treasure chests (tier 2)
- Terraprisma Schematic 4SchematicsCraft it at a Drafting Table · Yakushima treasure chests (tier 2)
- Marksman Revolver Schematic 4SchematicsTrade for it at the Arena shop
- Core Eject Shotgun Schematic 4SchematicsTrade for it at the Arena shop
- Cloth Outfit Schematic 1SchematicsGrassland treasure chests (tier 1) · Grassland fishing spots (tier 1)
- Cloth Outfit Schematic 2SchematicsGrassland treasure chests (tier 1) · Grassland fishing spots (tier 1)
- Cloth Outfit Schematic 3SchematicsGrassland chests at NPC spots (tier 1) · Grassland fishing spots (tier 1)
- Cloth Outfit Schematic 4SchematicsBeat the Dancer on the Steppe Chillet · Grassland treasure chests (tier 1)
- Tropical Outfit Schematic 1SchematicsGrassland treasure chests (tier 1) · Grassland fishing spots (tier 1)
- Tropical Outfit Schematic 2SchematicsGrassland treasure chests (tier 1) · Grassland fishing spots (tier 1)
- Tropical Outfit Schematic 3SchematicsGrassland treasure chests (tier 1) · Grassland fishing spots (tier 1)
- Tropical Outfit Schematic 4SchematicsGrassland treasure chests (tier 1) · Grassland fishing spots (tier 1)
- Tundra Outfit Schematic 1SchematicsGrassland treasure chests (tier 1) · Grassland fishing spots (tier 1)
- Tundra Outfit Schematic 2SchematicsGrassland treasure chests (tier 1) · Grassland fishing spots (tier 1)
- Tundra Outfit Schematic 3SchematicsGrassland treasure chests (tier 1) · Grassland fishing spots (tier 1)
- Tundra Outfit Schematic 4SchematicsGrassland treasure chests (tier 1) · Grassland fishing spots (tier 1)
- Pelt Armor Schematic 1SchematicsGrassland treasure chests (tier 2) · Grassland fishing spots (tier 2)
- Pelt Armor Schematic 2SchematicsMission: Dungeon Hunt · Grassland treasure chests (tier 2)
- Pelt Armor Schematic 3SchematicsGrassland treasure chests (tier 2) · Grassland fishing spots (tier 2)
- Pelt Armor Schematic 4SchematicsGrassland treasure chests (tier 2) · Grassland fishing spots (tier 2)
- Heat Resistant Pelt Armor Schematic 1SchematicsGrassland treasure chests (tier 2) · Grassland fishing spots (tier 2)
- Heat Resistant Pelt Armor Schematic 2SchematicsGrassland treasure chests (tier 2) · Grassland fishing spots (tier 2)
- Heat Resistant Pelt Armor Schematic 3SchematicsGrassland treasure chests (tier 2) · Grassland fishing spots (tier 2)
- Heat Resistant Pelt Armor Schematic 4SchematicsGrassland treasure chests (tier 2) · Grassland fishing spots (tier 2)
- Cold Resistant Pelt Armor Schematic 1SchematicsGrassland treasure chests (tier 2) · Grassland fishing spots (tier 2)
- Cold Resistant Pelt Armor Schematic 2SchematicsGrassland treasure chests (tier 2) · Grassland fishing spots (tier 2)
- Cold Resistant Pelt Armor Schematic 3SchematicsGrassland treasure chests (tier 2) · Grassland fishing spots (tier 2)
- Cold Resistant Pelt Armor Schematic 4SchematicsGrassland treasure chests (tier 2) · Grassland fishing spots (tier 2)
- Metal Armor Schematic 1SchematicsForest treasure chests (tier 2) · Forest fishing spots (tier 2)
- Metal Armor Schematic 2SchematicsForest treasure chests (tier 2) · Forest fishing spots (tier 2)
- Metal Armor Schematic 3SchematicsForest treasure chests (tier 2) · Forest fishing spots (tier 2)
- Metal Armor Schematic 4SchematicsForest treasure chests (tier 2) · Forest fishing spots (tier 2)
- Heat Resistant Metal Armor Schematic 1SchematicsForest treasure chests (tier 2) · Forest fishing spots (tier 2)
- Heat Resistant Metal Armor Schematic 2SchematicsForest treasure chests (tier 2) · Forest fishing spots (tier 2)
- Heat Resistant Metal Armor Schematic 3SchematicsForest treasure chests (tier 2) · Forest fishing spots (tier 2)
- Heat Resistant Metal Armor Schematic 4SchematicsForest treasure chests (tier 2) · Forest fishing spots (tier 2)
- Cold Resistant Metal Armor Schematic 1SchematicsForest treasure chests (tier 2) · Forest fishing spots (tier 2)
- Cold Resistant Metal Armor Schematic 2SchematicsForest treasure chests (tier 2) · Forest fishing spots (tier 2)
- Cold Resistant Metal Armor Schematic 3SchematicsForest treasure chests (tier 2) · Forest fishing spots (tier 2)
- Cold Resistant Metal Armor Schematic 4SchematicsForest treasure chests (tier 2) · Forest fishing spots (tier 2)
- Refined Metal Armor Schematic 1SchematicsVolcano treasure chests (tier 2) · Desert fishing spots (tier 2)
- Refined Metal Armor Schematic 2SchematicsVolcano treasure chests (tier 2) · Desert fishing spots (tier 2)
- Refined Metal Armor Schematic 3SchematicsVolcano treasure chests (tier 2) · Desert fishing spots (tier 2)
- Refined Metal Armor Schematic 4SchematicsVolcano treasure chests (tier 2) · Desert fishing spots (tier 2)
- Heat Resistant Refined Metal Armor Schematic 1SchematicsVolcano treasure chests (tier 2) · Desert fishing spots (tier 2)
- Heat Resistant Refined Metal Armor Schematic 2SchematicsVolcano treasure chests (tier 2) · Desert fishing spots (tier 2)
- Heat Resistant Refined Metal Armor Schematic 3SchematicsVolcano treasure chests (tier 2) · Desert fishing spots (tier 2)
- Heat Resistant Refined Metal Armor Schematic 4SchematicsDesert treasure chests (tier 2) · Desert fishing spots (tier 2)
- Cold Resistant Refined Metal Armor Schematic 1SchematicsVolcano treasure chests (tier 2) · Desert fishing spots (tier 2)
- Cold Resistant Refined Metal Armor Schematic 2SchematicsVolcano treasure chests (tier 2) · Desert fishing spots (tier 2)
- Cold Resistant Refined Metal Armor Schematic 3SchematicsVolcano treasure chests (tier 2) · Desert fishing spots (tier 2)
- Cold Resistant Refined Metal Armor Schematic 4SchematicsDesert treasure chests (tier 2) · Desert fishing spots (tier 2)
- Pal Metal Armor Schematic 1SchematicsSnowfield treasure chests (tier 2) · Snowfield fishing spots (tier 2)
- Pal Metal Armor Schematic 2SchematicsSnowfield treasure chests (tier 2) · Snowfield fishing spots (tier 2)
- Pal Metal Armor Schematic 3SchematicsSnowfield treasure chests (tier 2) · Snowfield fishing spots (tier 2)
- Pal Metal Armor Schematic 4SchematicsSnowfield treasure chests (tier 2) · Snowfield fishing spots (tier 2)
- Heat Resistant Pal Metal Armor Schematic 1SchematicsSnowfield treasure chests (tier 2) · Snowfield fishing spots (tier 2)
- Heat Resistant Pal Metal Armor Schematic 2SchematicsSnowfield treasure chests (tier 2) · Snowfield fishing spots (tier 2)
- Heat Resistant Pal Metal Armor Schematic 3SchematicsSnowfield treasure chests (tier 2) · Snowfield fishing spots (tier 2)
- Heat Resistant Pal Metal Armor Schematic 4SchematicsSnowfield treasure chests (tier 2) · Snowfield fishing spots (tier 2)
- Cold Resistant Pal Metal Armor Schematic 1SchematicsSnowfield treasure chests (tier 2) · Snowfield fishing spots (tier 2)
- Cold Resistant Pal Metal Armor Schematic 2SchematicsSnowfield treasure chests (tier 2) · Snowfield fishing spots (tier 2)
- Cold Resistant Pal Metal Armor Schematic 3SchematicsSnowfield treasure chests (tier 2) · Snowfield fishing spots (tier 2)
- Cold Resistant Pal Metal Armor Schematic 4SchematicsSnowfield treasure chests (tier 2) · Snowfield fishing spots (tier 2)
- Plasteel Armor Schematic 1SchematicsSakurajima treasure chests (tier 2) · Sakurajima enemy camp reward chest
- Plasteel Armor Schematic 2SchematicsSakurajima fishing spots (tier 2) · Sakurajima enemy camp reward chest
- Plasteel Armor Schematic 3SchematicsSakurajima enemy camp sea base chests · Sakurajima treasure chests (tier 2)
- Plasteel Armor Schematic 4SchematicsSakurajima enemy camp sea base chests · Sakurajima treasure chests (tier 2)
- Heat Resistant Plasteel Armor Schematic 1SchematicsSakurajima enemy camp reward chest · Sakurajima treasure chests (tier 2)
- Heat Resistant Plasteel Armor Schematic 2SchematicsSakurajima enemy camp reward chest · Sakurajima treasure chests (tier 2)
- Heat Resistant Plasteel Armor Schematic 3SchematicsSakurajima enemy camp sea base reward chest · Sakurajima treasure chests (tier 2)
- Heat Resistant Plasteel Armor Schematic 4SchematicsSakurajima enemy camp sea base reward chest · Sakurajima treasure chests (tier 2)
- Cold Resistant Plasteel Armor Schematic 1SchematicsSakurajima enemy camp reward chest · Sakurajima treasure chests (tier 2)
- Cold Resistant Plasteel Armor Schematic 2SchematicsSakurajima enemy camp reward chest · Sakurajima treasure chests (tier 2)
- Cold Resistant Plasteel Armor Schematic 3SchematicsSakurajima enemy camp sea base reward chest · Sakurajima treasure chests (tier 2)
- Cold Resistant Plasteel Armor Schematic 4SchematicsSakurajima enemy camp sea base reward chest · Sakurajima treasure chests (tier 2)
- Lightweight Plasteel Armor Schematic 1SchematicsSakurajima enemy camp reward chest · Lv55 oil rig Normal Chest
- Lightweight Plasteel Armor Schematic 2SchematicsSakurajima enemy camp reward chest · Craft it at a Drafting Table
- Lightweight Plasteel Armor Schematic 3SchematicsSakurajima enemy camp sea base reward chest · Craft it at a Drafting Table
- Lightweight Plasteel Armor Schematic 4SchematicsSakurajima enemy camp sea base reward chest · Craft it at a Drafting Table
- Hexolite Armor Schematic 1SchematicsSalvage, rank 2 · Feybreak supply caches
- Hexolite Armor Schematic 2SchematicsSalvage, rank 2 · Craft it at a Drafting Table
- Hexolite Armor Schematic 3SchematicsSalvage, rank 2 · Craft it at a Drafting Table
- Hexolite Armor Schematic 4SchematicsSalvage, rank 2 · Craft it at a Drafting Table
- Heat Resistant Hexolite Armor Schematic 1SchematicsSalvage, rank 2 · Feybreak supply caches
- Heat Resistant Hexolite Armor Schematic 2SchematicsSalvage, rank 2 · Craft it at a Drafting Table
- Heat Resistant Hexolite Armor Schematic 3SchematicsSalvage, rank 2 · Craft it at a Drafting Table
- Heat Resistant Hexolite Armor Schematic 4SchematicsSalvage, rank 2 · Craft it at a Drafting Table
- Cold Resistant Hexolite Armor Schematic 1SchematicsSalvage, rank 2 · Feybreak supply caches
- Cold Resistant Hexolite Armor Schematic 2SchematicsSalvage, rank 2 · Craft it at a Drafting Table
- Cold Resistant Hexolite Armor Schematic 3SchematicsSalvage, rank 2 · Craft it at a Drafting Table
- Cold Resistant Hexolite Armor Schematic 4SchematicsSalvage, rank 2 · Craft it at a Drafting Table
- Lightweight Hexolite Armor Schematic 1SchematicsLv60 oil rig Normal Chest
- Lightweight Hexolite Armor Schematic 2SchematicsCraft it at a Drafting Table · Treasure map dig spot
- Lightweight Hexolite Armor Schematic 3SchematicsCraft it at a Drafting Table · Feybreak enemy camp sea base reward chest
- Lightweight Hexolite Armor Schematic 4SchematicsCraft it at a Drafting Table · Treasure map dig spot
- Ancient Armor Schematic 1SchematicsSunreach supply caches · Sunreach fishing spots (tier 2)
- Ancient Armor Schematic 2SchematicsCraft it at a Drafting Table · Treasure map dig spot
- Ancient Armor Schematic 3SchematicsCraft it at a Drafting Table · Treasure map dig spot
- Ancient Armor Schematic 4SchematicsCraft it at a Drafting Table · Treasure map dig spot
- Heat-Resistant Ancient Armor Schematic 1SchematicsInside a Glistening Ancient Relic · World Tree fishing spots (tier 2)
- Heat-Resistant Ancient Armor Schematic 2SchematicsCraft it at a Drafting Table · Treasure map dig spot
- Heat-Resistant Ancient Armor Schematic 3SchematicsCraft it at a Drafting Table · Treasure map dig spot
- Heat-Resistant Ancient Armor Schematic 4SchematicsCraft it at a Drafting Table · Treasure map dig spot
- Cold-Resistant Ancient Armor Schematic 1SchematicsInside a Glistening Ancient Relic · World Tree fishing spots (tier 2)
- Cold-Resistant Ancient Armor Schematic 2SchematicsCraft it at a Drafting Table · Treasure map dig spot
- Cold-Resistant Ancient Armor Schematic 3SchematicsCraft it at a Drafting Table · Treasure map dig spot
- Cold-Resistant Ancient Armor Schematic 4SchematicsCraft it at a Drafting Table · Treasure map dig spot
- Lightweight Ancient Armor Schematic 1SchematicsInside a Glistening Ancient Relic · World Tree fishing spots (tier 2)
- Lightweight Ancient Armor Schematic 2SchematicsCraft it at a Drafting Table · Treasure map dig spot
- Lightweight Ancient Armor Schematic 3SchematicsCraft it at a Drafting Table · Treasure map dig spot
- Lightweight Ancient Armor Schematic 4SchematicsCraft it at a Drafting Table · Treasure map dig spot
- Hallowed Plate Mail SchematicSchematicsYakushima treasure chests
- Hallowed Plate Mail Schematic 1SchematicsCraft it at a Drafting Table · Yakushima treasure chests
- Hallowed Plate Mail Schematic 2SchematicsCraft it at a Drafting Table · Yakushima treasure chests
- Hallowed Plate Mail Schematic 3SchematicsCraft it at a Drafting Table · Yakushima treasure chests
- Hallowed Plate Mail Schematic 4SchematicsCraft it at a Drafting Table · Yakushima treasure chests
- V1 Armor Schematic 4SchematicsTrade for it at the Arena shop
- V2 Armor Schematic 4SchematicsTrade for it at the Arena shop
- Feathered Hair Band Schematic 1SchematicsGrassland treasure chests (tier 2) · Grassland fishing spots (tier 2)
- Feathered Hair Band Schematic 2SchematicsGrassland treasure chests (tier 2) · Grassland fishing spots (tier 2)
- Feathered Hair Band Schematic 3SchematicsGrassland treasure chests (tier 2) · Grassland fishing spots (tier 2)
- Feathered Hair Band Schematic 4SchematicsBeat the Pioneer of the Frozen Sea Penking · Grassland treasure chests (tier 2)
- Metal Helm Schematic 1SchematicsForest treasure chests (tier 2) · Forest fishing spots (tier 2)
- Metal Helm Schematic 2SchematicsForest treasure chests (tier 2) · Forest fishing spots (tier 2)
- Metal Helm Schematic 3SchematicsForest treasure chests (tier 2) · Forest fishing spots (tier 2)
- Metal Helm Schematic 4SchematicsForest treasure chests (tier 2) · Forest fishing spots (tier 2)
- Refined Metal Helm Schematic 1SchematicsVolcano treasure chests (tier 2) · Desert fishing spots (tier 2)
- Refined Metal Helm Schematic 2SchematicsVolcano treasure chests (tier 2) · Desert fishing spots (tier 2)
- Refined Metal Helm Schematic 3SchematicsVolcano treasure chests (tier 2) · Desert fishing spots (tier 2)
- Refined Metal Helm Schematic 4SchematicsVolcano treasure chests (tier 2) · Desert fishing spots (tier 2)
- Pal Metal Helm Schematic 1SchematicsSnowfield treasure chests (tier 2) · Snowfield fishing spots (tier 2)
- Pal Metal Helm Schematic 2SchematicsMission: Sparkly and Smooth · Snowfield treasure chests (tier 2)
- Pal Metal Helm Schematic 3SchematicsSnowfield treasure chests (tier 2) · Snowfield fishing spots (tier 2)
- Pal Metal Helm Schematic 4SchematicsSnowfield treasure chests (tier 2) · Snowfield fishing spots (tier 2)
- Plasteel Helmet Schematic 1SchematicsSakurajima treasure chests (tier 2) · Sakurajima fishing spots (tier 2)
- Plasteel Helmet Schematic 2SchematicsMission: A True Ascent Ends in Descent · Sakurajima fishing spots (tier 2)
- Plasteel Helmet Schematic 3SchematicsSakurajima enemy camp sea base reward chest · Sakurajima treasure chests (tier 2)
- Plasteel Helmet Schematic 4SchematicsSakurajima enemy camp sea base reward chest · Sakurajima treasure chests (tier 2)
- Hexolite Helmet Schematic 1SchematicsSalvage, rank 2 · Feybreak supply caches
- Hexolite Helmet Schematic 2SchematicsSalvage, rank 2 · Craft it at a Drafting Table
- Hexolite Helmet Schematic 3SchematicsSalvage, rank 2 · Craft it at a Drafting Table
- Hexolite Helmet Schematic 4SchematicsSalvage, rank 2 · Craft it at a Drafting Table
- Ancient Helm Schematic 1SchematicsSunreach supply caches · Sunreach fishing spots (tier 2)
- Ancient Helm Schematic 2SchematicsCraft it at a Drafting Table · Treasure map dig spot
- Ancient Helm Schematic 3SchematicsCraft it at a Drafting Table · Treasure map dig spot
- Ancient Helm Schematic 4SchematicsCraft it at a Drafting Table · Treasure map dig spot
- Hallowed Mask SchematicSchematicsYakushima treasure chests
- Hallowed Mask Schematic 1SchematicsCraft it at a Drafting Table · Yakushima treasure chests
- Hallowed Mask Schematic 2SchematicsCraft it at a Drafting Table · Yakushima treasure chests
- Hallowed Mask Schematic 3SchematicsCraft it at a Drafting Table · Yakushima treasure chests
- Hallowed Mask Schematic 4SchematicsCraft it at a Drafting Table · Yakushima treasure chests
- Hallowed Helmet SchematicSchematicsYakushima treasure chests
- Hallowed Helmet Schematic 1SchematicsCraft it at a Drafting Table · Yakushima treasure chests
- Hallowed Helmet Schematic 2SchematicsCraft it at a Drafting Table · Yakushima treasure chests
- Hallowed Helmet Schematic 3SchematicsCraft it at a Drafting Table · Yakushima treasure chests
- Hallowed Helmet Schematic 4SchematicsCraft it at a Drafting Table · Yakushima treasure chests
- Hallowed Headgear SchematicSchematicsYakushima treasure chests
- Hallowed Headgear Schematic 1SchematicsCraft it at a Drafting Table · Yakushima treasure chests
- Hallowed Headgear Schematic 2SchematicsCraft it at a Drafting Table · Yakushima treasure chests
- Hallowed Headgear Schematic 3SchematicsCraft it at a Drafting Table · Yakushima treasure chests
- Hallowed Headgear Schematic 4SchematicsCraft it at a Drafting Table · Yakushima treasure chests
- Hallowed Hood SchematicSchematicsYakushima treasure chests
- Hallowed Hood Schematic 1SchematicsCraft it at a Drafting Table · Yakushima treasure chests
- Hallowed Hood Schematic 2SchematicsCraft it at a Drafting Table · Yakushima treasure chests
- Hallowed Hood Schematic 3SchematicsCraft it at a Drafting Table · Yakushima treasure chests
- Hallowed Hood Schematic 4SchematicsCraft it at a Drafting Table · Yakushima treasure chests
- Monarch's Crown Schematic 1SchematicsBuy it from a Wandering Merchant
- Golden Crown Schematic 1SchematicsBuy it from a Wandering Merchant
- Long-Eared Headband Schematic 1SchematicsBuy it from a Wandering Merchant
- Witch Hat Schematic 1SchematicsBuy it from a Wandering Merchant
- Soft Hat Schematic 1SchematicsBuy it from a Wandering Merchant
- Helmet Schematic 1SchematicsBuy it from a Wandering Merchant
- Silk Hat Schematic 1SchematicsBuy it from a Wandering Merchant
- Tricorne Schematic 1SchematicsBuy it from a Wandering Merchant
- Exploration Cap Schematic 1SchematicsBuy it from a Wandering Merchant
- Graduation Cap Schematic 1SchematicsBuy it from a Wandering Merchant
- Farming Hat Schematic 1SchematicsBuy it from a Wandering Merchant
- Bowler Hat Schematic 1SchematicsBuy it from a Wandering Merchant
- Tocotoco Cap Schematic 1SchematicsBuy it from a Wandering Merchant
- Grinning Tocotoco Cap Schematic 1SchematicsBuy it from a Wandering Merchant
- Gumoss Cap Schematic 1SchematicsBuy it from a Wandering Merchant
- Penking Cap Schematic 1SchematicsBuy it from a Wandering Merchant
- Katress Cap Schematic 1SchematicsBuy it from a Wandering Merchant
- Leezpunk Hood Schematic 1SchematicsBuy it from a Wandering Merchant
- Killamari Cap Schematic 1SchematicsBuy it from a Wandering Merchant
- Ribbuny Headband Schematic 1SchematicsBuy it from a Wandering Merchant
- Swee Cap Schematic 1SchematicsBuy it from a Wandering Merchant
- Dazzi Hat Schematic 1SchematicsBuy it from a Wandering Merchant
- Bellanoir's Slab FragmentSchematicsReward from the Arrogant Pal Critic Kitsun · Forest treasure chests (tier 2)
- Bellanoir Libero's Slab FragmentSchematicsSnowfield treasure chests (tier 2) · Volcano enemy camp reward chest
- Blazamut Ryu Slab FragmentSchematicsReward from the Arrogant Pal Critic Warsect Terra · Snowfield treasure chests (tier 2)
- Xenolord Slab FragmentSchematicsReward from the Arrogant Pal Critic Omascul · Snowfield enemy camp reward chest
- Hartalis Slab FragmentSchematicsSnowfield enemy camp reward chest · Expedition to Feybreak (hard)
- Bellanoir Libero (Ultra) Slab FragmentSchematicsNo known source in 1.0.5
- Blazamut Ryu (Ultra) Slab FragmentSchematicsNo known source in 1.0.5
- Xenolord (Ultra) Slab FragmentSchematicsNo known source in 1.0.5
- Hartalis (Ultra) Slab FragmentSchematicsNo known source in 1.0.5
- Bellanoir's SlabConsumablesCraft it at a High Quality Workbench · Desert dungeon reward
- Bellanoir Libero's SlabConsumablesCraft it at a High Quality Workbench · Snowfield dungeon reward
- Blazamut Ryu SlabConsumablesCraft it at a High Quality Workbench · Sakurajima dungeon reward
- Xenolord SlabConsumablesCraft it at a High Quality Workbench · Viking dungeon reward
- Celestial SigilConsumablesCraft it at a High Quality Workbench
- Hartalis SlabConsumablesCraft it at a High Quality Workbench · Sunreach dungeon reward
- Bellanoir Libero (Ultra) SlabConsumablesCraft it at a High Quality Workbench · Beat the Twilight Siren Bellanoir Libero
- Blazamut Ryu (Ultra) SlabConsumablesCraft it at a High Quality Workbench · Beat the Incarnation of the Eternal Flame Blazamut Ryu
- Xenolord (Ultra) SlabConsumablesCraft it at a High Quality Workbench · Beat the Invader from Space Xenolord
- Celestial Sigil [Master]ConsumablesBeat the Moon Lord
- Hartalis (Ultra) SlabConsumablesCraft it at a High Quality Workbench · Beat the King of Salvation Hartalis
- Celestial Sigil SchematicSchematicsYakushima treasure chests (tier 2)
- Powerful Fishing MagnetConsumables · Tech 62Gather it on the map · Craft it at a Production Assembly Line II
- Rayne Syndicate Flag SchematicSchematicsGrassland enemy camp reward chest
- Lyleen Statue SchematicSchematicsForest enemy camp reward chest
- Free Pal Alliance Flag SchematicSchematicsForest enemy camp reward chest
- Free Pal Alliance Banner SchematicSchematicsForest enemy camp reward chest
- Wire Fence SchematicSchematicsDesert enemy camp reward chest
- Wooden Barricade SchematicSchematicsGrassland enemy camp reward chest
- Majestic Wall Torch SchematicSchematicsVolcano enemy camp reward chest
- Ceremonial Candlestick SchematicSchematicsVolcano enemy camp reward chest
- Majestic Candlestick SchematicSchematicsVolcano enemy camp reward chest
- Paper Lantern SchematicSchematicsSakurajima enemy camp reward chest
- Red Wooden Lantern SchematicSchematicsSakurajima enemy camp reward chest
- Yakumo Statue SchematicSchematicsSakurajima enemy camp reward chest
- Laboratory Desk SchematicSchematicsSnowfield enemy camp reward chest
- Laboratory Chair SchematicSchematicsSnowfield enemy camp reward chest
- Moon Lord Statue SchematicSchematicsBeat the [Master] Moon Lord
- Beginner Fishing Rod (Gumoss) SchematicSchematicsGrassland fishing spots (tier 1) · Grassland enemy camp sea base reward chest
- Intermediate Fishing Rod (Croajiro) SchematicSchematicsFishing Pond (Sakurajima fish) · Sakurajima rare fishing spots
- Advanced Fishing Rod (Depresso) SchematicSchematicsVolcano enemy camp sea base reward chest · Salvage, rank 2
- Life Pendant SchematicSchematicsAncient Ruin · Feybreak treasure chests
- Attack Pendant SchematicSchematicsAncient Ruin · Feybreak treasure chests
- Defense Pendant SchematicSchematicsAncient Ruin · Feybreak treasure chests
- Pendant of Diligence SchematicSchematicsAncient Ruin · Feybreak treasure chests
- Heat-Resistant Undershirt SchematicSchematicsAncient Ruin · Feybreak treasure chests
- Thermal Undershirt SchematicSchematicsAncient Ruin · Feybreak treasure chests
- Multiclimate Undershirt SchematicSchematicsAncient Ruin · Feybreak treasure chests
- Ring of Neutral Resistance SchematicSchematicsAncient Ruin · Feybreak treasure chests
- Ring of Fire Resistance SchematicSchematicsAncient Ruin Cave Entrance · Feybreak treasure chests
- Ring of Water Resistance SchematicSchematicsAncient Ruin · Feybreak treasure chests
- Ring of Electric Resistance SchematicSchematicsAncient Ruin · Feybreak treasure chests
- Ring of Grass Resistance SchematicSchematicsAncient Ruin · Feybreak treasure chests
- Ring of Ice Resistance SchematicSchematicsAncient Ruin · Feybreak treasure chests
- Ring of Ground Resistance SchematicSchematicsAncient Ruin Cave Entrance · Feybreak treasure chests
- Ring of Dark Resistance SchematicSchematicsAncient Ruin · Feybreak treasure chests
- Ring of Dragon Resistance SchematicSchematicsAncient Ruin · Feybreak treasure chests
- Ring of Freight SchematicSchematicsAncient Ruin · Feybreak treasure chests
- Neutral Support Whistle SchematicSchematicsAncient Ruin Cave Entrance · Feybreak treasure chests
- Fire Support Whistle SchematicSchematicsAncient Ruin Cave Entrance · Feybreak treasure chests
- Water Support Whistle SchematicSchematicsAncient Ruin · Feybreak treasure chests
- Electric Support Whistle SchematicSchematicsAncient Ruin · Feybreak treasure chests
- Grass Support Whistle SchematicSchematicsAncient Ruin · Feybreak treasure chests
- Ice Support Whistle SchematicSchematicsAncient Ruin · Feybreak treasure chests
- Ground Support Whistle SchematicSchematicsAncient Ruin · Feybreak treasure chests
- Dark Support Whistle SchematicSchematicsAncient Ruin · Feybreak treasure chests
- Dragon Support Whistle SchematicSchematicsAncient Ruin · Feybreak treasure chests
- Attack Support Whistle SchematicSchematicsAncient Ruin · Feybreak treasure chests
- Defense Support Whistle SchematicSchematicsAncient Ruin · Feybreak treasure chests
- Growth Acceleration Bell SchematicSchematicsAncient Ruin · Feybreak treasure chests
- Dogen Emblem SchematicSchematicsAncient Ruin · Sunreach treasure chests
- Silvegis Emblem SchematicSchematicsAncient Ruin Cave Entrance · Sunreach treasure chests
- Reptyro Charm SchematicSchematicsAncient Ruin · Sunreach treasure chests
- Wumpo Charm SchematicSchematicsAncient Ruin Cave Entrance · Sunreach treasure chests
- Wandering Merchant Charm SchematicSchematicsAncient Ruin · Sunreach treasure chests
- Vanguard Charm SchematicSchematicsAncient Ruin · Sunreach treasure chests
- Warsect Terra's Belt SchematicSchematicsAncient Ruin · Sunreach treasure chests
- Islander's Tool Belt SchematicSchematicsAncient Ruin Cave Entrance · Sunreach treasure chests
- Celestial Emperor's Baton SchematicSchematicsAncient Ruin · Sunreach treasure chests
- Flame Emperor's Baton SchematicSchematicsAncient Ruin · Sunreach treasure chests
- Lord of the Sea's Baton SchematicSchematicsAncient Ruin · Sunreach treasure chests
- Lord of Lightning's Baton SchematicSchematicsAncient Ruin · Sunreach treasure chests
- Spirit Emperor's Baton SchematicSchematicsAncient Ruin Cave Entrance · Sunreach treasure chests
- Ice Emperor's Baton SchematicSchematicsAncient Ruin · Sunreach treasure chests
- Earth Emperor's Baton SchematicSchematicsAncient Ruin · Sunreach treasure chests
- Lord of the Underworld's Baton SchematicSchematicsAncient Ruin · Sunreach treasure chests
- Divine Dragon's Baton SchematicSchematicsAncient Ruin · Sunreach treasure chests
- Pal Tamer's Glasses SchematicSchematicsAncient Ruin · Sunreach treasure chests
- Air Walker Mk I SchematicSchematicsAncient Ruin · Sunreach treasure chests
- Air Walker Mk II SchematicSchematicsAncient Ruin · Sunreach treasure chests
- Air Walker Mk III SchematicSchematicsAncient Ruin · Sunreach treasure chests
- Air Walker EX SchematicSchematicsAncient Ruin · Sunreach treasure chests
- Hartalis's Talisman SchematicSchematicsAncient Ruin Cave Entrance · Sunreach treasure chests
- Blazamut's Talisman SchematicSchematicsAncient Ruin Cave Entrance · Sunreach treasure chests
- Neptilius's Talisman SchematicSchematicsAncient Ruin · Sunreach treasure chests
- Orserk's Talisman SchematicSchematicsAncient Ruin · Sunreach treasure chests
- Lyleen's Talisman SchematicSchematicsAncient Ruin · Sunreach treasure chests
- Frostallion's Talisman SchematicSchematicsAncient Ruin · Sunreach treasure chests
- Anubis's Talisman SchematicSchematicsAncient Ruin · Sunreach treasure chests
- Lyleen Noct's Talisman SchematicSchematicsAncient Ruin · Sunreach treasure chests
- Jetragon's Talisman SchematicSchematicsAncient Ruin · Sunreach treasure chests
- Blazehowl Ring SchematicSchematicsAncient Ruin · Sunreach treasure chests
- Faleris Aqua Ring SchematicSchematicsAncient Ruin · Sunreach treasure chests
- Fenglope Lux Ring SchematicSchematicsAncient Ruin · Sunreach treasure chests
- Menasting Terra Ring SchematicSchematicsAncient Ruin · Sunreach treasure chests
- Vaelet Ring SchematicSchematicsAncient Ruin · Sunreach treasure chests
- Katress Ring SchematicSchematicsAncient Ruin · Sunreach treasure chests
- Elphidran Ring SchematicSchematicsAncient Ruin · Sunreach treasure chests
- Cryolinx Ring SchematicSchematicsAncient Ruin · Sunreach treasure chests
- Faleris Ring SchematicSchematicsAncient Ruin · Sunreach treasure chests
- Ring of Trust SchematicSchematicsAncient Ruin · Sunreach treasure chests
- Phantom Ring SchematicSchematicsAncient Ruin · Sunreach treasure chests
- Huge Mutated EggEggsBreed it at a Breeding Farm
- Sunreach Rapid-Fire AmmoAmmoCraft it
- Sunreach Single-Shot AmmoAmmoCraft it
- Lifmunk EffigyKey itemsPick it up on the map
- Lamball EffigyKey itemsPick it up on the map
- Pengullet EffigyKey itemsPick it up on the map
- Munchill EffigyKey itemsPick it up on the map
- Rooby EffigyKey itemsPick it up on the map
- Herbil EffigyKey itemsPick it up on the map
- Tanzee EffigyKey itemsPick it up on the map
- Depresso EffigyKey itemsPick it up on the map
- Cattiva EffigyKey itemsPick it up on the map
- Lunaris EffigyKey itemsPick it up on the map
- Relaxaurus EffigyKey itemsPick it up on the map
- Yakumo EffigyKey itemsPick it up on the map
- Mimog EffigyKey itemsPick it up on the map
- Hip LanternKey items · Tech 15Craft it at a High Quality Workbench
- Enhanced Hip LanternKey items · Tech 29Craft it at a Production Assembly Line
- Small Feed BagKey items · Tech 9Craft it at a High Quality Workbench
- Average Feed BagKey items · Tech 14Craft it at a High Quality Workbench
- Large Feed BagKey items · Tech 23Craft it at a High Quality Workbench
- Huge Feed BagKey items · Tech 36Craft it at a Production Assembly Line
- Giant Feed BagKey items · Tech 47Craft it at a Production Assembly Line
- Mysterious Accessory BoxKey itemsTrade for it at the Medal Merchant
- Mystic Accessory BoxKey itemsTrade for it at the Medal Merchant
- Lockpicking Tool v1Key items · Tech 16Craft it at a High Quality Workbench
- Lockpicking Tool v2Key items · Tech 25Craft it at a High Quality Workbench
- Lockpicking Tool v3Key items · Tech 53Craft it at a High Quality Workbench
- Rushoar SaddlePal gear (saddles) · Tech 6Craft it at a Pal Gear Workbench
- Foxparks' HarnessPal gear (saddles) · Tech 6Craft it at a Pal Gear Workbench
- Foxparks Cryst's HarnessPal gear (saddles) · Tech 24Craft it at a Pal Gear Workbench
- Melpaca SaddlePal gear (saddles) · Tech 7Craft it at a Pal Gear Workbench
- Celaray's GlovesPal gear (saddles)Craft it
- Celaray Lux's GlovesPal gear (saddles)Craft it
- Jolthog's GlovesPal gear (saddles)Craft it
- Jolthog Cryst's GlovesPal gear (saddles)Craft it
- Daedream's NecklacePal gear (saddles)Craft it
- Direhowl's Saddled HarnessPal gear (saddles) · Tech 9Craft it at a Pal Gear Workbench
- Killamari's GlovesPal gear (saddles)Craft it
- Killamari Primo's GlovesPal gear (saddles)Craft it
- Chillet SaddlePal gear (saddles) · Tech 11Craft it at a Pal Gear Workbench
- Chillet Ignis SaddlePal gear (saddles) · Tech 40Craft it at a Pal Gear Workbench
- Lifmunk's Submachine GunPal gear (saddles) · Tech 11Craft it at a Pal Gear Workbench
- Tanzee's Assault RiflePal gear (saddles) · Tech 12Craft it at a Pal Gear Workbench
- Tanzee Ignis's Assault RiflePal gear (saddles) · Tech 13Craft it at a Pal Gear Workbench
- Eikthyrdeer SaddlePal gear (saddles) · Tech 12Craft it at a Pal Gear Workbench
- Eikthyrdeer Terra SaddlePal gear (saddles) · Tech 21Craft it at a Pal Gear Workbench
- Univolt SaddlePal gear (saddles) · Tech 14Craft it at a Pal Gear Workbench
- Univolt Cryst SaddlePal gear (saddles) · Tech 64Craft it at a Pal Gear Workbench
- Arsox SaddlePal gear (saddles) · Tech 15Craft it at a Pal Gear Workbench
- Nitewing SaddlePal gear (saddles) · Tech 15Craft it at a Pal Gear Workbench
- Surfent SaddlePal gear (saddles) · Tech 16Craft it at a Pal Gear Workbench
- Surfent Terra SaddlePal gear (saddles) · Tech 25Craft it at a Pal Gear Workbench
- Pengullet Rocket LauncherPal gear (saddles) · Tech 17Craft it at a Pal Gear Workbench
- Pengullet Lux's Rocket LauncherPal gear (saddles) · Tech 18Craft it at a Pal Gear Workbench
- Flopie's NecklacePal gear (saddles)Craft it
- Tocotoco's GlovesPal gear (saddles) · Tech 18Craft it at a Pal Gear Workbench
- Digtoise's HeadbandPal gear (saddles)Craft it
- Hangyu's GlovesPal gear (saddles)Craft it
- Hangyu Cryst's GlovePal gear (saddles)Craft it
- Grintale SaddlePal gear (saddles) · Tech 19Craft it at a Pal Gear Workbench
- Elphidran SaddlePal gear (saddles) · Tech 20Craft it at a Pal Gear Workbench
- Elphidran Aqua SaddlePal gear (saddles) · Tech 32Craft it at a Pal Gear Workbench
- Tarantriss SaddlePal gear (saddles) · Tech 20Craft it at a Pal Gear Workbench
- Vanwyrm SaddlePal gear (saddles) · Tech 21Craft it at a Pal Gear Workbench
- Vanwyrm Cryst SaddlePal gear (saddles) · Tech 22Craft it at a Pal Gear Workbench
- Sweepa SaddlePal gear (saddles) · Tech 20Craft it at a Pal Gear Workbench
- Dazzi's NecklacePal gear (saddles)Craft it
- Dazzi Noct's NecklacePal gear (saddles)Craft it
- Kingpaca SaddlePal gear (saddles) · Tech 23Craft it at a Pal Gear Workbench
- Kingpaca Cryst SaddlePal gear (saddles) · Tech 46Craft it at a Pal Gear Workbench
- Galeclaw's GlovesPal gear (saddles)Craft it
- Azurobe SaddlePal gear (saddles) · Tech 24Craft it at a Pal Gear Workbench
- Azurobe Cryst SaddlePal gear (saddles) · Tech 27Craft it at a Pal Gear Workbench
- Dinossom SaddlePal gear (saddles) · Tech 24Craft it at a Pal Gear Workbench
- Dinossom Lux SaddlePal gear (saddles) · Tech 34Craft it at a Pal Gear Workbench
- Helzephyr SaddlePal gear (saddles) · Tech 25Craft it at a Pal Gear Workbench
- Helzephyr Lux SaddlePal gear (saddles) · Tech 47Craft it at a Pal Gear Workbench
- Fenglope SaddlePal gear (saddles) · Tech 26Craft it at a Pal Gear Workbench
- Fenglope Lux SaddlePal gear (saddles) · Tech 57Craft it at a Pal Gear Workbench
- Polapup SaddlePal gear (saddles) · Tech 26Craft it at a Pal Gear Workbench
- Herbil's HarnessPal gear (saddles)Craft it
- Dazemu SaddlePal gear (saddles) · Tech 28Craft it at a Pal Gear Workbench
- Pyrin SaddlePal gear (saddles) · Tech 29Craft it at a Pal Gear Workbench
- Pyrin Noct SaddlePal gear (saddles) · Tech 34Craft it at a Pal Gear Workbench
- Mammorest SaddlePal gear (saddles) · Tech 28Craft it at a Pal Gear Workbench
- Mammorest Cryst SaddlePal gear (saddles) · Tech 41Craft it at a Pal Gear Workbench
- Beakon SaddlePal gear (saddles) · Tech 29Craft it at a Pal Gear Workbench
- Beakon Cryst SaddlePal gear (saddles) · Tech 71Craft it at a Pal Gear Workbench
- Rayhound SaddlePal gear (saddles) · Tech 30Craft it at a Pal Gear Workbench
- Rayhound Cryst SaddlePal gear (saddles) · Tech 32Craft it at a Pal Gear Workbench
- Ghangler SaddlePal gear (saddles) · Tech 31Craft it at a Pal Gear Workbench
- Ghangler Ignis SaddlePal gear (saddles) · Tech 42Craft it at a Pal Gear Workbench
- Mossanda's Grenade LauncherPal gear (saddles) · Tech 32Craft it at a Pal Gear Workbench
- Mossanda Lux's Grenade LauncherPal gear (saddles) · Tech 34Craft it at a Pal Gear Workbench
- Reindrix SaddlePal gear (saddles) · Tech 31Craft it at a Pal Gear Workbench
- Blazehowl SaddlePal gear (saddles) · Tech 33Craft it at a Pal Gear Workbench
- Blazehowl Noct SaddlePal gear (saddles) · Tech 35Craft it at a Pal Gear Workbench
- Ragnahawk SaddlePal gear (saddles) · Tech 33Craft it at a Pal Gear Workbench
- Broncherry SaddlePal gear (saddles) · Tech 33Craft it at a Pal Gear Workbench
- Broncherry Aqua SaddlePal gear (saddles) · Tech 44Craft it at a Pal Gear Workbench
- Palumba SaddlePal gear (saddles) · Tech 35Craft it at a Pal Gear Workbench
- Braloha SaddlePal gear (saddles) · Tech 36Craft it at a Pal Gear Workbench
- Moldron SaddlePal gear (saddles) · Tech 36Craft it at a Pal Gear Workbench
- Moldron Cryst SaddlePal gear (saddles) · Tech 70Craft it at a Pal Gear Workbench
- Maraith SaddlePal gear (saddles) · Tech 37Craft it at a Pal Gear Workbench
- Quivern SaddlePal gear (saddles) · Tech 38Craft it at a Pal Gear Workbench
- Quivern Botan SaddlePal gear (saddles) · Tech 45Craft it at a Pal Gear Workbench
- Astegon SaddlePal gear (saddles) · Tech 39Craft it at a Pal Gear Workbench
- Shroomer SaddlePal gear (saddles) · Tech 39Craft it at a Pal Gear Workbench
- Shroomer Noct SaddlePal gear (saddles) · Tech 39Craft it at a Pal Gear Workbench
- Grizzbolt's MinigunPal gear (saddles) · Tech 40Craft it at a Pal Gear Workbench
- Xenogard SaddlePal gear (saddles) · Tech 41Craft it at a Pal Gear Workbench
- Yakumo SaddlePal gear (saddles) · Tech 41Craft it at a Pal Gear Workbench
- Whalaska SaddlePal gear (saddles) · Tech 42Craft it at a Pal Gear Workbench
- Whalaska Ignis SaddlePal gear (saddles) · Tech 71Craft it at a Pal Gear Workbench
- Reptyro SaddlePal gear (saddles) · Tech 42Craft it at a Pal Gear Workbench
- Reptyro Cryst SaddlePal gear (saddles) · Tech 43Craft it at a Pal Gear Workbench
- Suzaku SaddlePal gear (saddles) · Tech 43Craft it at a Pal Gear Workbench
- Suzaku Aqua SaddlePal gear (saddles) · Tech 44Craft it at a Pal Gear Workbench
- Relaxaurus' Missile LauncherPal gear (saddles) · Tech 45Craft it at a Pal Gear Workbench
- Relaxaurus Lux's Missile LauncherPal gear (saddles) · Tech 48Craft it at a Pal Gear Workbench
- Wumpo SaddlePal gear (saddles) · Tech 45Craft it at a Pal Gear Workbench
- Wumpo Botan SaddlePal gear (saddles) · Tech 51Craft it at a Pal Gear Workbench
- Shadowbeak SaddlePal gear (saddles) · Tech 47Craft it at a Pal Gear Workbench
- Dualith SaddlePal gear (saddles) · Tech 48Craft it at a Pal Gear Workbench
- Dualith Noct SaddlePal gear (saddles) · Tech 69Craft it at a Pal Gear Workbench
- Tetroise SaddlePal gear (saddles) · Tech 48Craft it at a Pal Gear Workbench
- Tetroise Primo SaddlePal gear (saddles) · Tech 75Craft it at a Pal Gear Workbench
- Nyafia's ShotgunPal gear (saddles) · Tech 52Craft it at a Pal Gear Workbench
- Selyne SaddlePal gear (saddles) · Tech 53Craft it at a Pal Gear Workbench
- Bulldosu SaddlePal gear (saddles) · Tech 53Craft it at a Pal Gear Workbench
- Gildane SaddlePal gear (saddles) · Tech 54Craft it at a Pal Gear Workbench
- Polapup Terra SaddlePal gear (saddles) · Tech 55Craft it at a Pal Gear Workbench
- Starryon SaddlePal gear (saddles) · Tech 57Craft it at a Pal Gear Workbench
- Starryon Primo SaddlePal gear (saddles) · Tech 77Craft it at a Pal Gear Workbench
- Kitsun SaddlePal gear (saddles) · Tech 57Craft it at a Pal Gear Workbench
- Kitsun Noct SaddlePal gear (saddles) · Tech 59Craft it at a Pal Gear Workbench
- Smokie's HarnessPal gear (saddles) · Tech 58Craft it at a Pal Gear Workbench
- Azurmane SaddlePal gear (saddles) · Tech 58Craft it at a Pal Gear Workbench
- Faleris SaddlePal gear (saddles) · Tech 60Craft it at a Pal Gear Workbench
- Faleris Aqua SaddlePal gear (saddles) · Tech 60Craft it at a Pal Gear Workbench
- Silvegis SaddlePal gear (saddles) · Tech 60Craft it at a Pal Gear Workbench
- Solmora SaddlePal gear (saddles) · Tech 65Craft it at a Pal Gear Workbench
- Solmora Lux SaddlePal gear (saddles) · Tech 66Craft it at a Pal Gear Workbench
- Dynamoff SaddlePal gear (saddles) · Tech 66Craft it at a Pal Gear Workbench
- Xenolord SaddlePal gear (saddles) · Tech 66Craft it at a Pal Gear Workbench
- Eidrolon SaddlePal gear (saddles) · Tech 68Craft it at a Pal Gear Workbench
- Eidrolon Ignis SaddlePal gear (saddles) · Tech 76Craft it at a Pal Gear Workbench
- Roujay SaddlePal gear (saddles) · Tech 72Craft it at a Pal Gear Workbench
- Ophydia SaddlePal gear (saddles) · Tech 72Craft it at a Pal Gear Workbench
- Bastigor's HammerPal gear (saddles) · Tech 73Craft it at a Pal Gear Workbench
- Shaolong SaddlePal gear (saddles) · Tech 77Craft it at a Pal Gear Workbench
- Aegidron SaddlePal gear (saddles) · Tech 79Craft it at a Pal Gear Workbench
- Jormuntide SaddlePal gear (saddles) · Tech 40Craft it at a Pal Gear Workbench
- Jormuntide Ignis SaddlePal gear (saddles) · Tech 59Craft it at a Pal Gear Workbench
- Blazamut SaddlePal gear (saddles) · Tech 46Craft it at a Pal Gear Workbench
- Blazamut Ryu SaddlePal gear (saddles) · Tech 55Craft it at a Pal Gear Workbench
- Celesdir SaddlePal gear (saddles) · Tech 54Craft it at a Pal Gear Workbench
- Celesdir Noct SaddlePal gear (saddles) · Tech 78Craft it at a Pal Gear Workbench
- Paladius SaddlePal gear (saddles) · Tech 61Craft it at a Pal Gear Workbench
- Necromus SaddlePal gear (saddles) · Tech 61Craft it at a Pal Gear Workbench
- Frostallion SaddlePal gear (saddles) · Tech 62Craft it at a Pal Gear Workbench
- Frostallion Noct SaddlePal gear (saddles) · Tech 62Craft it at a Pal Gear Workbench
- Neptilius SaddlePal gear (saddles) · Tech 64Craft it at a Pal Gear Workbench
- Hartalis SaddlePal gear (saddles) · Tech 70Craft it at a Pal Gear Workbench
- Jetragon's Missile LauncherPal gear (saddles) · Tech 70Craft it at a Pal Gear Workbench
- Extra Weapon HolsterKey items · Tech 27Craft it at a High Quality Workbench
- Extra Weapon Holster 2Key items · Tech 54Craft it at a High Quality Workbench
- Small PouchKey items · Tech 27Craft it at a High Quality Workbench
- Medium PouchKey items · Tech 43Craft it at a High Quality Workbench
- Large PouchKey items · Tech 53Craft it at a Production Assembly Line
- Giant PouchKey items · Tech 57Craft it at a Production Assembly Line II
- Heavy Weight ModuleSpheres · Tech 19Craft it at a Sphere Workbench
- Curve ModuleSpheres · Tech 23Craft it at a Sphere Workbench
- Sniper ModuleSpheres · Tech 31Craft it at a Sphere Workbench
- Slider ModuleSpheres · Tech 39Craft it at a Sphere Workbench
- Sniper Module IISpheres · Tech 48Craft it at a Sphere Workbench
- Homing ModuleSpheres · Tech 69Craft it at an Ancient Workbench
- Chillet Bounty TokenKey itemsBeat the Dancer on the Steppe Chillet
- Sweepa Bounty TokenKey itemsBeat the King of the Floof Sweepa
- Gumoss Bounty TokenKey itemsBeat the Suddenly Transformed Gumoss
- Dumud Bounty TokenKey itemsBeat the Perpetual Procrastinator Dumud
- Penking Bounty TokenKey itemsBeat the Pioneer of the Frozen Sea Penking
- Azurobe Bounty TokenKey itemsBeat the Lady of the Lake Azurobe
- Grintale Bounty TokenKey itemsBeat the Marshmallow Body Grintale
- Nitewing Bounty TokenKey itemsBeat the Wings of the Firmament Nitewing
- Quivern Bounty TokenKey itemsBeat the Snow-White Soarer Quivern
- Felbat Bounty TokenKey itemsBeat the Gloom-Shrouded Bloodsucker Felbat
- Kingpaca Bounty TokenKey itemsBeat the Supreme Fluff Commander Kingpaca
- Broncherry Bounty TokenKey itemsBeat the Winds of Spring Broncherry
- Katress Bounty TokenKey itemsBeat the Phantasmal Feline Katress
- Bushi Bounty TokenKey itemsBeat the Vagrant Warrior Bushi
- Fenglope Bounty TokenKey itemsBeat the Drifting Cloud Fenglope
- Petallia Bounty TokenKey itemsBeat the Lady of the Flower Garden Petallia
- Beakon Bounty TokenKey itemsBeat the Wings of Thunderbolt Beakon
- Warsect Bounty TokenKey itemsBeat the Unyielding Colossus Warsect
- Broncherry Aqua Bounty TokenKey itemsBeat the Waves of Summer Broncherry Aqua
- Elphidran Bounty TokenKey itemsBeat the Gentle Sky Dragon Elphidran
- Relaxaurus Lux Bounty TokenKey itemsBeat the Gluttonous Thunder Dragon Relaxaurus Lux
- Univolt Bounty TokenKey itemsBeat the Swift Deity Univolt
- Elizabee Bounty TokenKey itemsBeat the Empress of the Hive Elizabee
- Mossanda Lux Bounty TokenKey itemsBeat the Inheritor of the Storm Mossanda Lux
- Lunaris Bounty TokenKey itemsBeat the Extraterrestrial Lunaris
- Verdash Bounty TokenKey itemsBeat the Gale of the Forest Verdash
- Wumpo Botan Bounty TokenKey itemsBeat the Guardian of the Grassy Fields Wumpo Botan
- Mammorest Bounty TokenKey itemsBeat the King of the Forest Mammorest
- Vaelet Bounty TokenKey itemsBeat the Voice of the Violets Vaelet
- Sibelyx Bounty TokenKey itemsBeat the Pallid Lady Sibelyx
- Menasting Bounty TokenKey itemsBeat the Unstoppable Stinger Menasting
- Suzaku Bounty TokenKey itemsBeat the Ruler of the Crimson Dawn Suzaku
- Jormuntide Bounty TokenKey itemsBeat the Emperor of the Sea Jormuntide
- Kingpaca Cryst Bounty TokenKey itemsBeat the Azure Fluff Commander Kingpaca Cryst
- Dinossom Lux Bounty TokenKey itemsBeat the Guardian of Lightning Dinossom Lux
- Anubis Bounty TokenKey itemsBeat a Guardian of the Dark Sun Anubis
- Astegon Bounty TokenKey itemsBeat the Draconic Monarch of Steel Astegon
- Blazamut Bounty TokenKey itemsBeat the Cursed Tyrant Blazamut
- Lyleen Noct Bounty TokenKey itemsBeat the Empress of the Abyss Lyleen Noct
- Menasting Terra Bounty TokenKey itemsBeat the Gold-Piercing Spear Menasting Terra
- Knocklem Bounty TokenKey itemsBeat the Suit of Armor Knocklem
- Splatterina Bounty TokenKey itemsBeat the Crimson Butcher Splatterina
- Azurmane Bounty TokenKey itemsBeat the Blue Lightning Steed Azurmane
- Kitsun Noct Bounty TokenKey itemsBeat the Guardian of the Dark Flame Kitsun Noct
- Fenglope Lux Bounty TokenKey itemsBeat the Drifting Thundercloud Fenglope Lux
- Celesdir Bounty TokenKey itemsBeat the Beast of Salvation Celesdir
- Silvegis Bounty TokenKey itemsBeat the Guardian Dragon of Ironclad Silvegis
- Faleris Aqua Bounty TokenKey itemsBeat the Sentinel of the Tides Faleris Aqua
- Jetragon Bounty TokenKey itemsBeat the Legendary Celestial Dragon Jetragon
- Frostallion Bounty TokenKey itemsBeat the Legendary Steed of Ice Frostallion
- Twin Knights Bounty TokenKey itemsBeat the Holy Knight of Legend Paladius
- Smokie Bounty TokenKey itemsBeat the Jet-Black Little Hero Smokie
- Nitemary Bounty TokenKey itemsBeat the Soul of the Green Rabbit Nitemary Botan
- Starryon Bounty TokenKey itemsBeat the Midnight Blue Mane Starryon
- Prunelia Bounty TokenKey itemsBeat the Indigo Handmaiden Prunelia
- Nyafia Bounty TokenKey itemsBeat the Night Shade Hunter Nyafia
- Gildane Bounty TokenKey itemsBeat the Guardian Beast of Twilight Gildane
- Omascul Bounty TokenKey itemsBeat the Hundred-Faced Apostle Omascul
- Tarantris Bounty TokenKey itemsBeat the Tactician of the Thread Realm Tarantriss
- Frostallion Noct Bounty TokenKey itemsBeat the Legendary Steed of Darkness Frostallion Noct
- Foxparks Cryst Bounty TokenKey itemsBeat the Icy Blossom Voyager Foxparks Cryst
- Dazzi Noct Bounty TokenKey itemsBeat the Born of the Thunderclouds Dazzi Noct
- Cryolinx Terra Bounty TokenKey itemsBeat the Predator of the Earth Cryolinx Terra
- Caprity Noct Bounty TokenKey itemsBeat the Tainted Farm Caprity Noct
- Loupmoon Cryst Bounty TokenKey itemsBeat the Enraptured by the Frozen Moonlight Loupmoon Cryst
- Ribbuny Botan Bounty TokenKey itemsBeat the Sparkling Smile Ribbuny Botan
- Warsect Terra Bounty TokenKey itemsBeat the Gold-Armored Warrior Warsect Terra
- Whalaska Bounty TokenKey itemsBeat the Gentle Ice Lance Whalaska
- Neptilius Bounty TokenKey itemsBeat the Legend of the Seas Neptilius
- Whalaska Ignis Bounty TokenKey itemsBeat the Gentle Crimson Lance Whalaska Ignis
- Dandilord's PetalKey itemsBeat the Bewitching Lurker Dandilord
- Silvance's PlumeKey itemsBeat the Immortal Shade Silvance
- Modified Pal's Contaminated CoreKey itemsBeat the Highly Modified Grizzbolt
- Pyrin Bounty TokenKey itemsBeat the Steed of Flames Pyrin
- Tetroise Bounty TokenKey itemsBeat the Sandsea Monolith Tetroise
- Reptyro Bounty TokenKey itemsBeat the Lava-Devouring Juggernaut Reptyro
- Renjishi Bounty TokenKey itemsBeat the Scorching Ovation Renjishi
- Moldron Cryst Bounty TokenKey itemsBeat the Frigid Voyager Moldron Cryst
- Dualith Bounty TokenKey itemsBeat the Twinhearted Azure Construct Dualith
- Mycora Bounty TokenKey itemsBeat the Cute as a Button Mycora
- Celesdir Noct Bounty TokenKey itemsBeat the Beast of Chaos Celesdir Noct
- Pierdon Cryst Bounty TokenKey itemsBeat the Shuffling Glacier Pierdon Cryst
- Ophydia Bounty TokenKey itemsBeat the Pure Bloom Dragon Ophydia
- Flaracle Bounty TokenKey itemsBeat the Self-Serving Seer Flaracle
- Dynamoff Bounty TokenKey itemsBeat the Buzzy Bundle Dynamoff
- Slowatt Bounty TokenKey itemsBeat the Shockingly Laid-Back Slowatt
- Snock Bounty TokenKey itemsBeat the Sluggish Blue Bolt Snock
- Eidrolon Bounty TokenKey itemsBeat the Wings of Freedom Eidrolon
- Lyleen Bounty TokenKey itemsBeat the Empress of Lilies Lyleen
- Grizzbolt Bounty TokenKey itemsBeat the Claws of Lightning Grizzbolt
- Dualith Noct Bounty TokenKey itemsBeat the Twinhearted Violet Construct Dualith Noct
- Blazehowl Bounty TokenKey itemsBeat the Crimson Goliath Blazehowl
- Arsox Bounty TokenKey itemsBeat the Blazing Brute Arsox
- Foxcicle Bounty TokenKey itemsBeat the Frostbound Fox Foxcicle
- Wixen Bounty TokenKey itemsBeat the Fire-Licked Furball Wixen
- Tetroise Primo Bounty TokenKey itemsBeat the Sandsea Wardenstone Tetroise Primo
- Wistella Bounty TokenKey itemsBeat the Mantle of the Night Sky Wistella
- Prixter Lux Bounty TokenKey itemsBeat the Thunderboy Prixter Lux
- Pierdon Bounty TokenKey itemsBeat the Shambling Vein Pierdon
- Moldron Bounty TokenKey itemsBeat the Scorched Wanderer Moldron
- Needoll Bounty TokenKey itemsBeat the Prickly Welcome Needoll
- Aegidron Bounty TokenKey itemsBeat the Guardian of Luminous Trails Aegidron
- Zoe's Halloween CostumeConsumablesCraft it at a High Quality Workbench
- Gold CoinMaterialsPut Vixy on a Ranch · Mission: Pal's Blessing
- Treasure MapConsumablesGather it on the map · Reward from the Arrogant Gourmet Broncherry Rib Roast
- AccumulatorStructures · Tech 37Build it
- Advanced ChestStructures · Tech 59Build it
- Advanced Medicine WorkbenchStructures · Tech 61Build it
- Advanced Sphere Assembly LineStructures · Tech 58Build it
- Advanced Weapon Assembly LineStructures · Tech 63Build it
- Advanced WorkshopStructures · Tech 62Build it
- Alarm BellStructures · Tech 7Build it
- Alpha Wave GeneratorStructures · Tech 41Build it
- Ancient ClinicStructures · Tech 73Build it
- Ancient FarmStructures · Tech 78Build it
- Ancient FurnaceStructures · Tech 66Build it
- Ancient HatcheryStructures · Tech 76Build it
- Ancient Hot SpringStructures · Tech 76Build it
- Ancient KitchenStructures · Tech 70Build it
- Ancient Material SynthesizerStructures · Tech 78Build it
- Ancient Monitoring StandStructures · Tech 71Build it
- Ancient Pal BedStructures · Tech 73Build it
- Ancient Power GeneratorStructures · Tech 75Build it
- Ancient Relic RecyclerStructures · Tech 74Build it
- Ancient WorkbenchStructures · Tech 67Build it
- Antique DresserStructures · Tech 21Build it
- Berry PlantationStructures · Tech 5Build it
- Beta Wave GeneratorStructures · Tech 46Build it
- Breeding FarmStructures · Tech 19Build it
- CampfireStructures · Tech 2Build it
- Carrot PlantationStructures · Tech 32Build it
- Ceiling LampStructures · Tech 27Build it
- ClinicStructures · Tech 24Build it
- Coal MineStructures · Tech 37Build it
- Cold Food BoxStructures · Tech 51Build it
- Cooking PotStructures · Tech 17Build it
- CoolerStructures · Tech 18Build it
- Cooler BoxStructures · Tech 13Build it
- Crude Oil ExtractorStructures · Tech 50Build it
- CrusherStructures · Tech 8Build it
- Defensive WallStructures · Tech 19Build it
- Dimensional Pal StorageStructures · Tech 20Build it
- Drafting TableStructures · Tech 45Build it
- Egg IncubatorStructures · Tech 10Build it
- Electric CoolerStructures · Tech 42Build it
- Electric Egg IncubatorStructures · Tech 36Build it
- Electric FurnaceStructures · Tech 44Build it
- Electric HeaterStructures · Tech 41Build it
- Electric KitchenStructures · Tech 41Build it
- Electric Medicine WorkbenchStructures · Tech 43Build it
- Electric MineStructures · Tech 33Build it
- Electric PylonStructures · Tech 48Build it
- Feed BoxStructures · Tech 4Build it
- Fine BedStructures · Tech 28Build it
- Fishing PondStructures · Tech 31Build it
- Flame CauldronStructures · Tech 21Build it
- Flower BedStructures · Tech 24Build it
- Fluffy Pal BedStructures · Tech 24Build it
- Frostallion StatueStructures · Tech 64Build it
- Gigantic FurnaceStructures · Tech 58Build it
- Global PalboxStructures · Tech 3Build it
- Gold Coin Assembly LineStructures · Tech 73Build it
- Guild ChestStructures · Tech 41Build it
- Hanging TrapStructures · Tech 8Build it
- HeaterStructures · Tech 17Build it
- Hexolite Quartz MineStructures · Tech 62Build it
- High Quality Hot SpringStructures · Tech 31Build it
- High Quality Monitoring StandStructures · Tech 28Build it
- High Quality WorkbenchStructures · Tech 11Build it
- High-Pressure Crude Oil ExtractorStructures · Tech 51Build it
- Hot SpringStructures · Tech 9Build it
- Human-Powered GeneratorStructures · Tech 26Build it
- Ice MineStructures · Tech 38Build it
- Improved FurnaceStructures · Tech 34Build it
- Iron GateStructures · Tech 30Build it
- Item Retrieval MachineStructures · Tech 49Build it
- Japanese-Style Hot SpringStructures · Tech 64Build it
- Jetragon StatueStructures · Tech 70Build it
- LadderStructures · Tech 10Build it
- LampStructures · Tech 26Build it
- Large Ceiling LampStructures · Tech 47Build it
- Large Fishing PondStructures · Tech 69Build it
- Large IncubatorStructures · Tech 48Build it
- Large Mounted LampStructures · Tech 46Build it
- Large Pal BedStructures · Tech 36Build it
- Large Power GeneratorStructures · Tech 50Build it
- Large ToolboxStructures · Tech 20Build it
- Large-Scale Electric Egg IncubatorStructures · Tech 58Build it
- Large-Scale Stone OvenStructures · Tech 49Build it
- Lettuce PlantationStructures · Tech 25Build it
- Logging SiteStructures · Tech 7Build it
- Logging Site IIStructures · Tech 43Build it
- Medicine RackStructures · Tech 24Build it
- Medieval Medicine WorkbenchStructures · Tech 12Build it
- Metal ChestStructures · Tech 13Build it
- Metal Defensive WallStructures · Tech 30Build it
- MillStructures · Tech 15Build it
- MineStructures · Tech 30Build it
- Monitoring StandStructures · Tech 7Build it
- Mounted CrossbowStructures · Tech 26Build it
- Mounted Machine GunStructures · Tech 40Build it
- Mounted Missile LauncherStructures · Tech 50Build it
- Mounted TorchStructures · Tech 6Build it
- Onion PlantationStructures · Tech 36Build it
- Ore Mining SiteStructures · Tech 24Build it
- Ore Mining Site IIStructures · Tech 39Build it
- Pal Disassembly ConveyorStructures · Tech 56Build it
- Pal Dressing FacilityStructures · Tech 2Build it
- Pal Essence CondenserStructures · Tech 14Build it
- Pal Expedition StationStructures · Tech 22Build it
- Pal Gear WorkbenchStructures · Tech 6Build it
- Pal Labor Research LabStructures · Tech 19Build it
- Pal PodStructures · Tech 56Build it
- Pal Surgery TableStructures · Tech 38Build it
- PalboxStructures · Tech 2Build it
- Palbox Control DeviceStructures · Tech 32Build it
- Pickaxe and HelmetStructures · Tech 30Build it
- Potato PlantationStructures · Tech 29Build it
- Power GeneratorStructures · Tech 26Build it
- Primitive FurnaceStructures · Tech 10Build it
- Primitive WorkbenchStructures · Tech 1Build it
- Production Assembly LineStructures · Tech 29Build it
- Production Assembly Line IIStructures · Tech 42Build it
- Pure Quartz QuarryStructures · Tech 52Build it
- RanchStructures · Tech 5Build it
- Refined Metal ChestStructures · Tech 39Build it
- Refrigerated CrusherStructures · Tech 54Build it
- RefrigeratorStructures · Tech 38Build it
- Repair BenchStructures · Tech 2Build it
- SandbagStructures · Tech 7Build it
- Shoddy BedStructures · Tech 3Build it
- SignStructures · Tech 6Build it
- SiloStructures · Tech 25Build it
- Skillfruit OrchardStructures · Tech 71Build it
- SnowmanStructures · Tech 33Build it
- Soralite QuarryStructures · Tech 72Build it
- Sphere Assembly LineStructures · Tech 27Build it
- Sphere Assembly Line IIStructures · Tech 35Build it
- Sphere WorkbenchStructures · Tech 14Build it
- Statue of PowerStructures · Tech 9Build it
- Stone GateStructures · Tech 19Build it
- Stone PitStructures · Tech 7Build it
- Straw Pal BedStructures · Tech 3Build it
- Stump and AxeStructures · Tech 28Build it
- Sulfur MineStructures · Tech 46Build it
- Tomato PlantationStructures · Tech 21Build it
- TombstoneStructures · Tech 17Build it
- Training DummyStructures · Tech 13Build it
- Viewing CageStructures · Tech 15Build it
- Wall TorchStructures · Tech 14Build it
- Wall-Mounted SignStructures · Tech 6Build it
- Water FountainStructures · Tech 23Build it
- Weapon Assembly LineStructures · Tech 32Build it
- Weapon Assembly Line IIStructures · Tech 47Build it
- Weapon WorkbenchStructures · Tech 20Build it
- Wheat PlantationStructures · Tech 15Build it
- Witch CauldronStructures · Tech 32Build it
- Wooden ChestStructures · Tech 2Build it
- Wooden Defensive WallStructures · Tech 8Build it
- Wooden GateStructures · Tech 8Build it
- Key Sphere of EnvyKey itemsBeat the Rayne Syndicate Boss Zoe & Grizzbolt
- Key Sphere of PrideKey itemsBeat the Free Pal Alliance Founder Lily & Lyleen
- Key Sphere of GreedKey itemsBeat the PIDF Commander Marcus & Faleris
- Key Sphere of SlothKey itemsBeat the Brothers of the Eternal Pyre Soul Leader Axel & Orserk
- Key Sphere of GluttonyKey itemsBeat the PAL Genetic Research Unit Commander Victor & Shadowbeak
- Key Sphere of LustKey itemsBeat the Leader of the Moonflowers Saya & Selyne
- Key Sphere of WrathKey itemsBeat the Jarl of Feybreak Bjorn & Bastigor
- Key Sphere of Original SinKey itemsBeat the High Keeper of the Azure Covenant Auri & Shaolong
- Marine EchoboneKey itemsNo known source in 1.0.5
- Silent EchoboneKey itemsNo known source in 1.0.5
- Seafoam EchoboneKey itemsNo known source in 1.0.5
- Tidewind EchoboneKey itemsNo known source in 1.0.5
- Echoing FluteKey itemsCraft it at a High Quality Workbench
No item matches these filters.
Quick answers
How many items are in Palworld?
This database lists 1,607 items you can get in Palworld 1.0.5 and 155 structures. 1,089 of them have a recipe and 116 drop from wild Pals. Items the game’s data holds but gives no way to get, like unfinished gear, are left out.
How do I find where to get an item?
Search it above and open its page. The best ways come first, ordered by how early in the game you can use them: crafting by technology level, merchants, nodes on the map, the Pals that drop it by where they spawn, then chests, expeditions and bosses. Each page links the map with that item’s spots.
How do I see the raw materials for something I want to craft?
Open the crafting calculator, pick what you want and how many. It works out the whole recipe tree, the total of each raw material, and where to get each one.
Where does this data come from?
Recipes, drops, merchants and loot tables for Palworld 1.0.5; where each chest, merchant and node sits comes from our interactive map. The icons are the game’s own.
More free Palworld tools
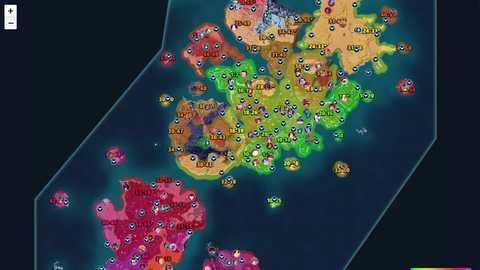
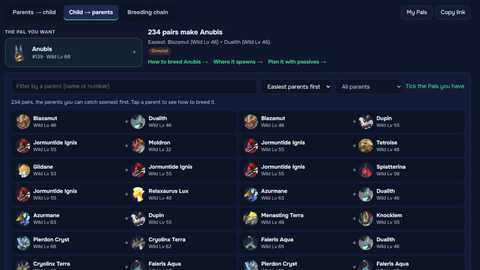
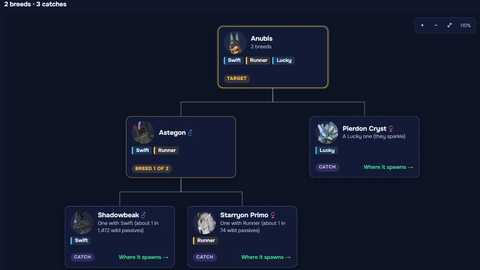

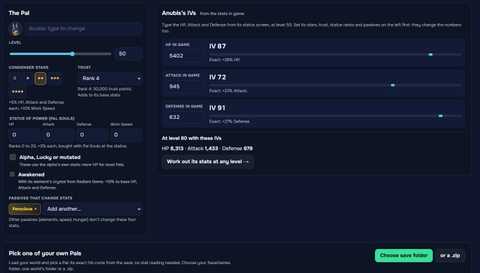
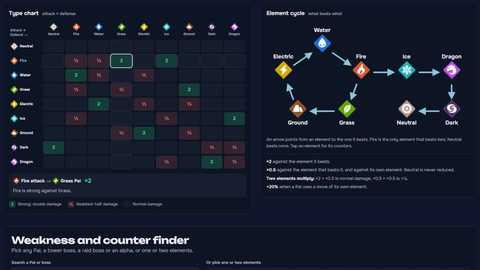


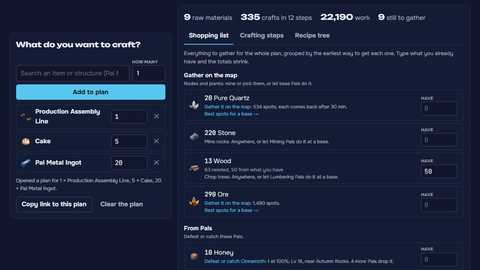




Palworld 1.0.5. Pal icons from Palworld, © Pocketpair, Inc. Game Hosting is not affiliated with Pocketpair.