Game Hosting guide
How to use the Palworld co-op save converter
Copy a co-op world to a server as it is and the host lands on the character screen: co-op saves the host under a fixed ID. The converter fixes that in your browser and gives you a world ready for the server. Here is the whole move, from the host’s PC to the host joining the server.
- 5 steps
- Free, no account
- Runs in your browser
Step 1: Find the co-op world
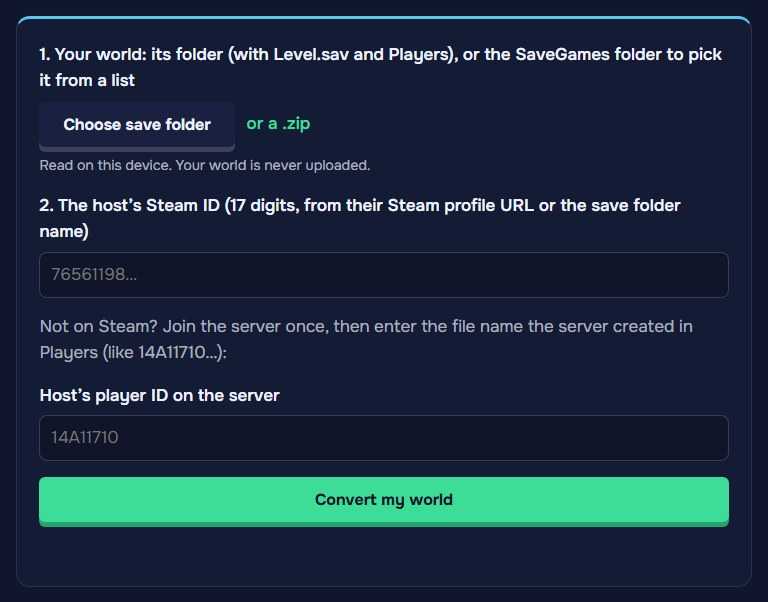
The world is on the host’s PC. On Steam for Windows it’s in
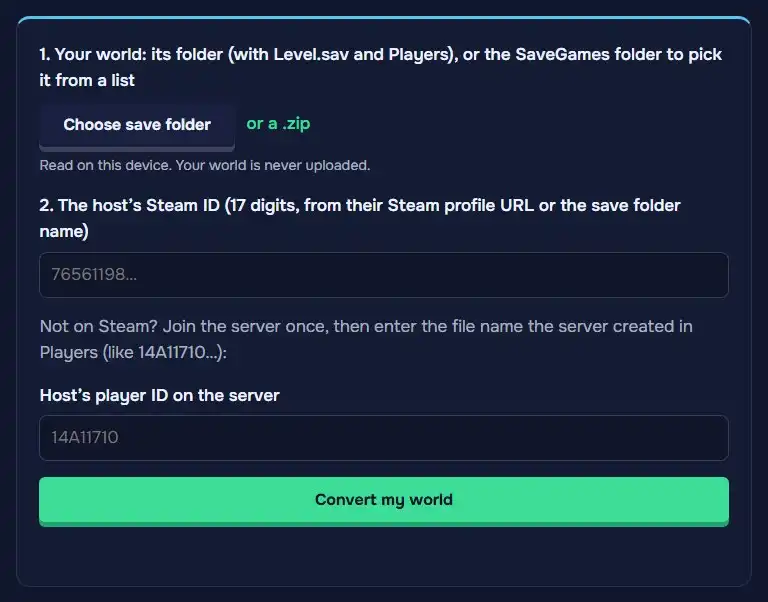
%LOCALAPPDATA%\Pal\Saved\SaveGames\<Steam ID>\<world ID>\.Click Choose save folder and choose the SaveGames folder (or the Steam ID folder) to pick the world from a list. You can also choose the world’s own folder, the one with Level.sav and Players, or a .zip of it.
Your browser may ask whether to “upload” the files. That is its word for letting the page read them: the save is read on your device and never leaves it.
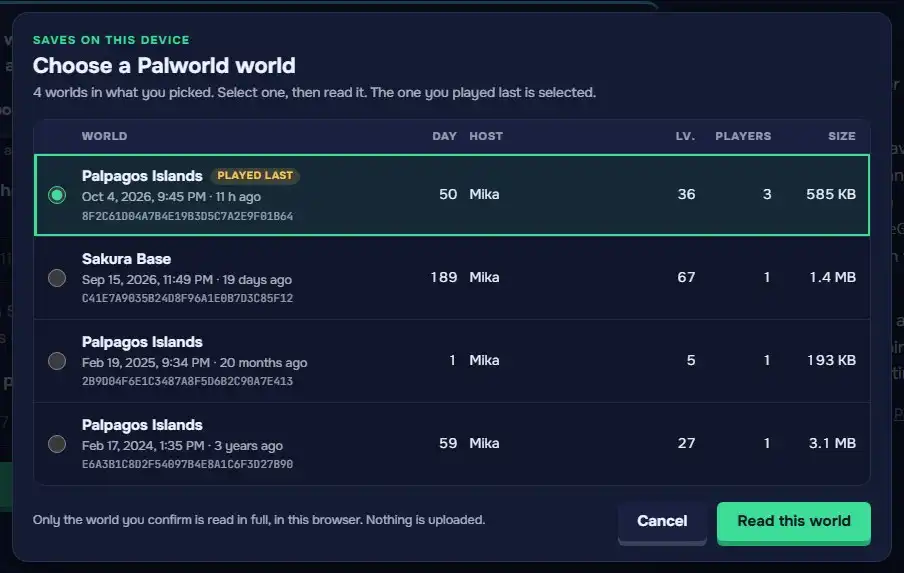
Step 2: Pick the co-op world
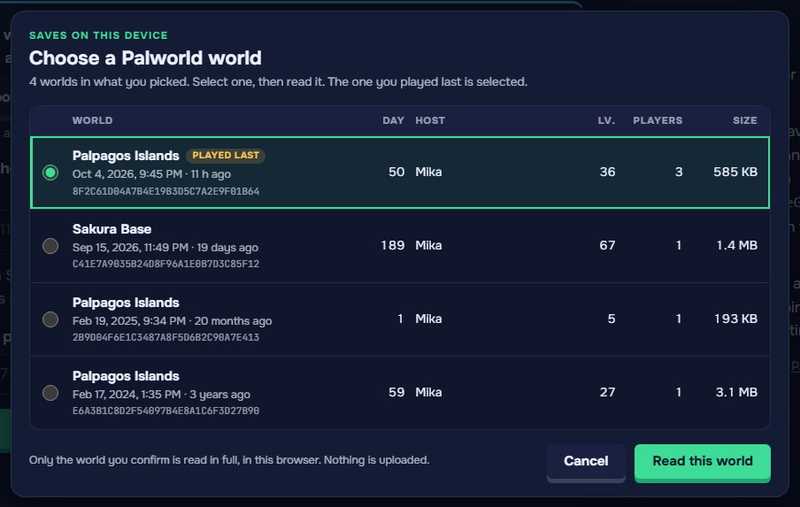
When the folder holds several worlds, choose the co-op one. The list shows each world’s name, in-game day, host, host level, players and size, last played first.
Step 3: Check the host’s Steam ID
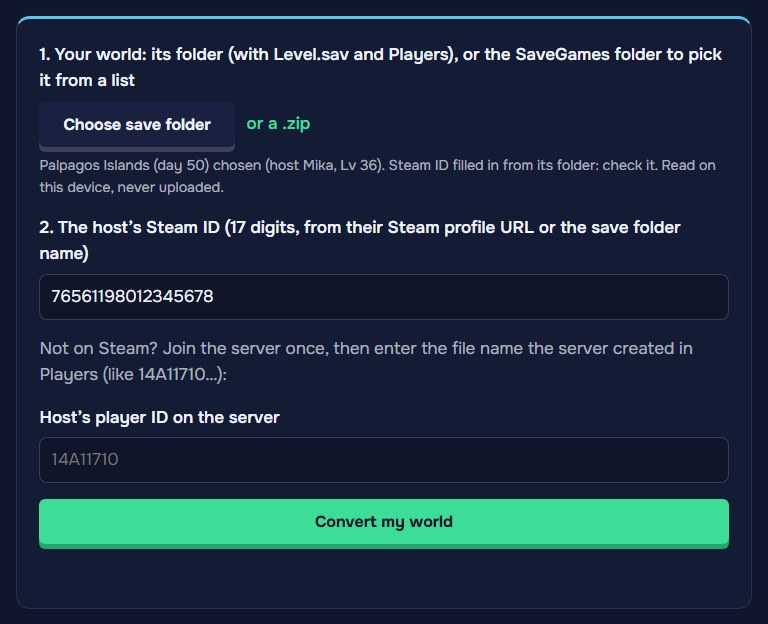
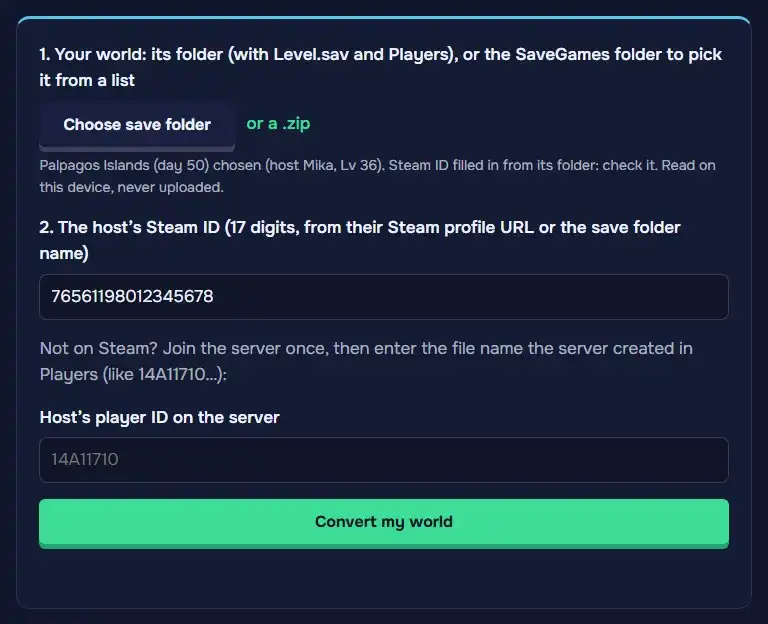
If you picked the world from the list, the host’s Steam ID is filled in from its folder name. Check it’s the host’s: 17 digits, also in their Steam profile URL. Chose the world’s folder directly? Type it in.
Not on Steam? Have the host join the server once, then type the file name the server created in its Players folder (like 14A11710…) as Host’s player ID on the server.
Step 4: Convert it
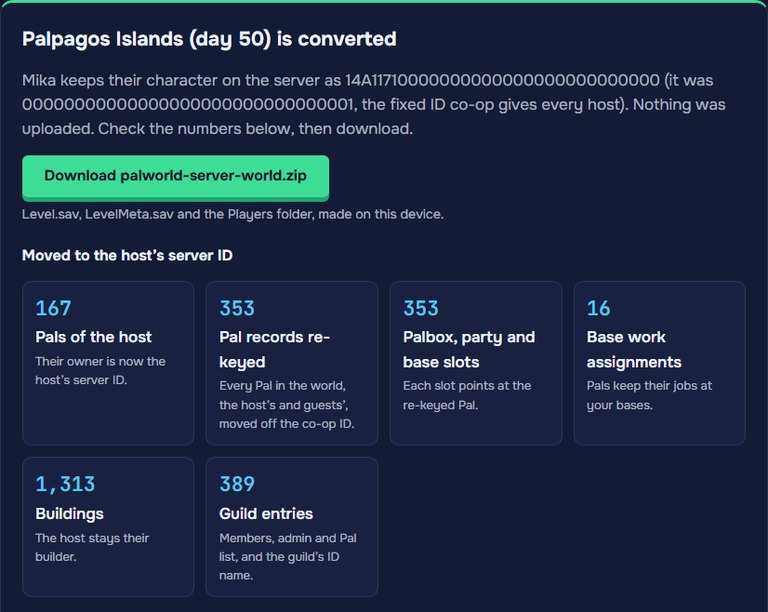
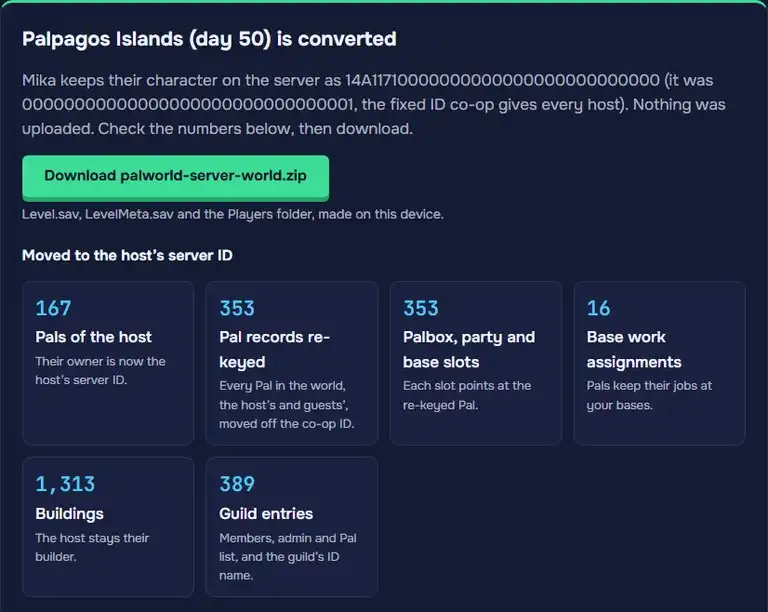
Click Convert my world. The converter moves the host’s character, Pals, guild and buildings to their server ID, then shows what it changed: the host’s Pals, Pal records, base slots and work, expeditions, buildings and guild entries, the files it renamed (the host’s character and Dimensional Pal Storage) and a check that nothing still points at the co-op ID.
WorldOption.sav and LocalData.sav are left out on purpose, and the report says why: on a server, WorldOption.sav overrides your settings, and LocalData.sav is each player’s explored map, which stays on their PC. Then click Download palworld-server-world.zip for Level.sav, LevelMeta.sav and the Players folder.
Big worlds take up to a minute. Everything happens in your browser: the world is never uploaded.
Step 5: Put it on the server
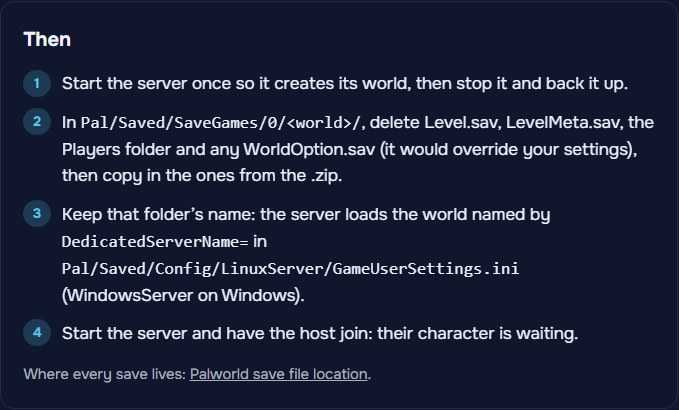
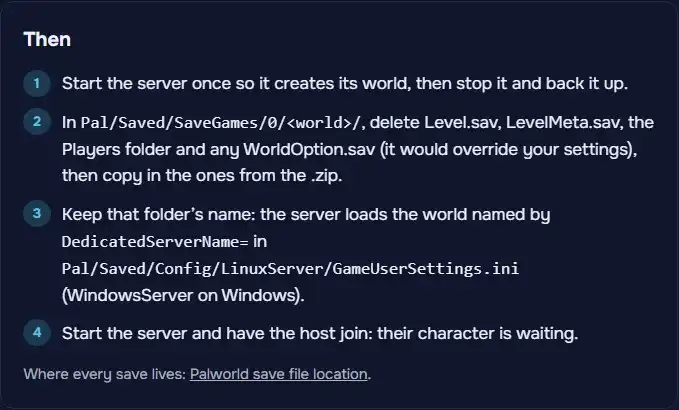
Start the server once so it creates its world, then stop it and back up
Pal/Saved/SaveGames/0/<world ID>/.In that folder, delete Level.sav, LevelMeta.sav, the Players folder and any WorldOption.sav, then copy in the files from the .zip. Keep the folder’s name: the server loads the world named on the
DedicatedServerName=line ofPal/Saved/Config/LinuxServer/GameUserSettings.ini(WindowsServer on Windows).Start the server and have the host join: their character is waiting. Steam guests keep theirs too.
Our guide to moving a co-op world to a dedicated server covers every case, from Game Pass saves to a server that rolls back to day 1.
That’s the whole move
If the host still gets the character screen, the ID was wrong: compare the file name in Players with the one the server created when they joined once. On a Game Hosting server, the panel’s “Bring my world” does all of this for you.
Open the co-op save converter